Management app Workflow document
Management Login
After installing this app, only coaches or managers will have access to the management app.

Fixtures
Step-1:
The overall pages, including Fixtures,
People/Places, Stats, and Settings, are
visible. Clicking on the Fixtures allows us to view the match details.

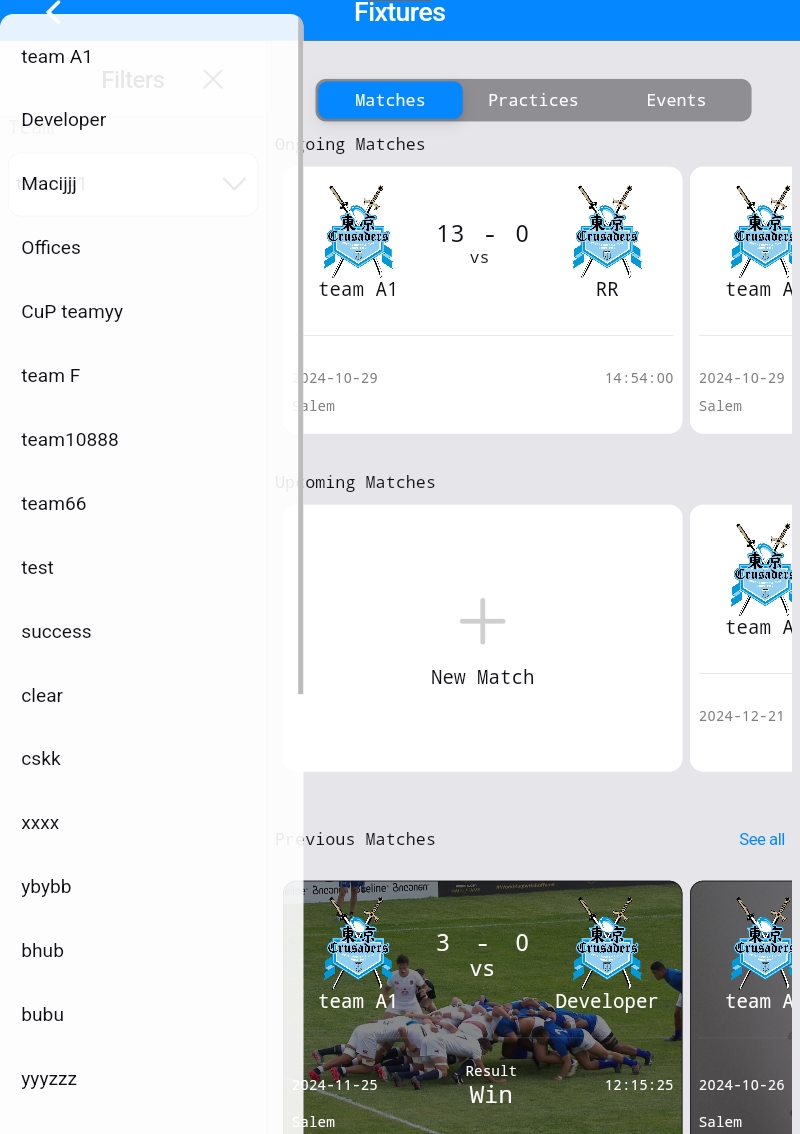
Step-2:
We can view all match and event details on the
fixtures page. We can also use the filter on the left side to see specific details:
clicking "Match" will show only match details, clicking "Events" will show only event
details, and clicking "All" will display both match and event details
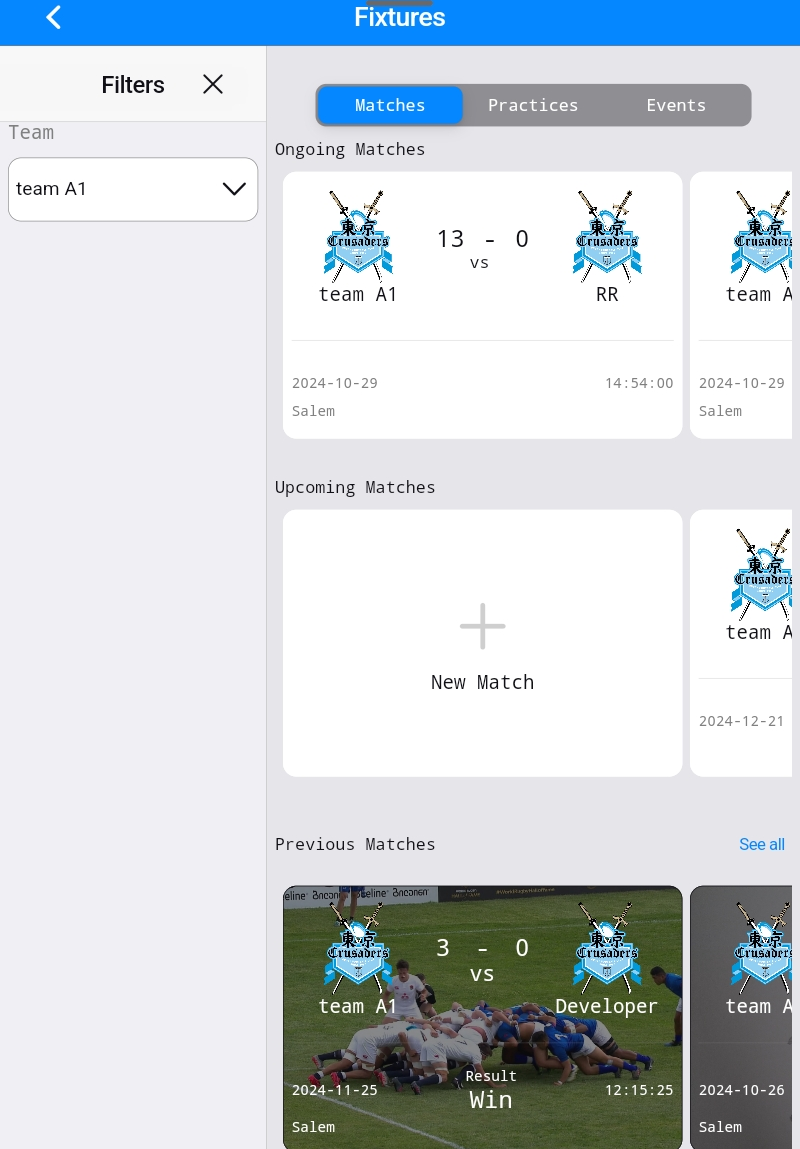
Step 3:To create a new match, click on the "+" symbol and fill in all the mandatory fields.

Step-4:
Click on a match to view the on-going match
details.

Step-5:
It is mandatory to fill in these details before the
match starts. Complete all the required fields and then click save.

Step-6:
We will add a referee for the match. Click the
"Add Referee" button.
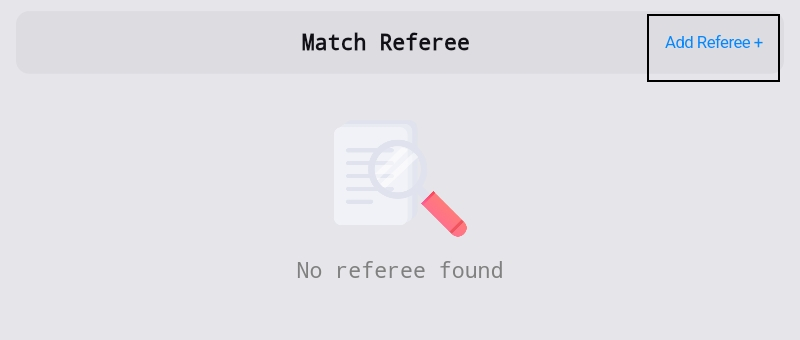
Step-7:
After completing step 6, create a new referee for
the match.

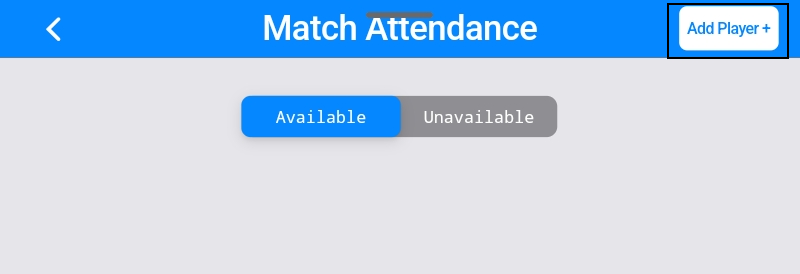
Step-8:
If additional players suddenly join the match,
they can be added by clicking the "Add Player" button on the right side of the screen.
During match
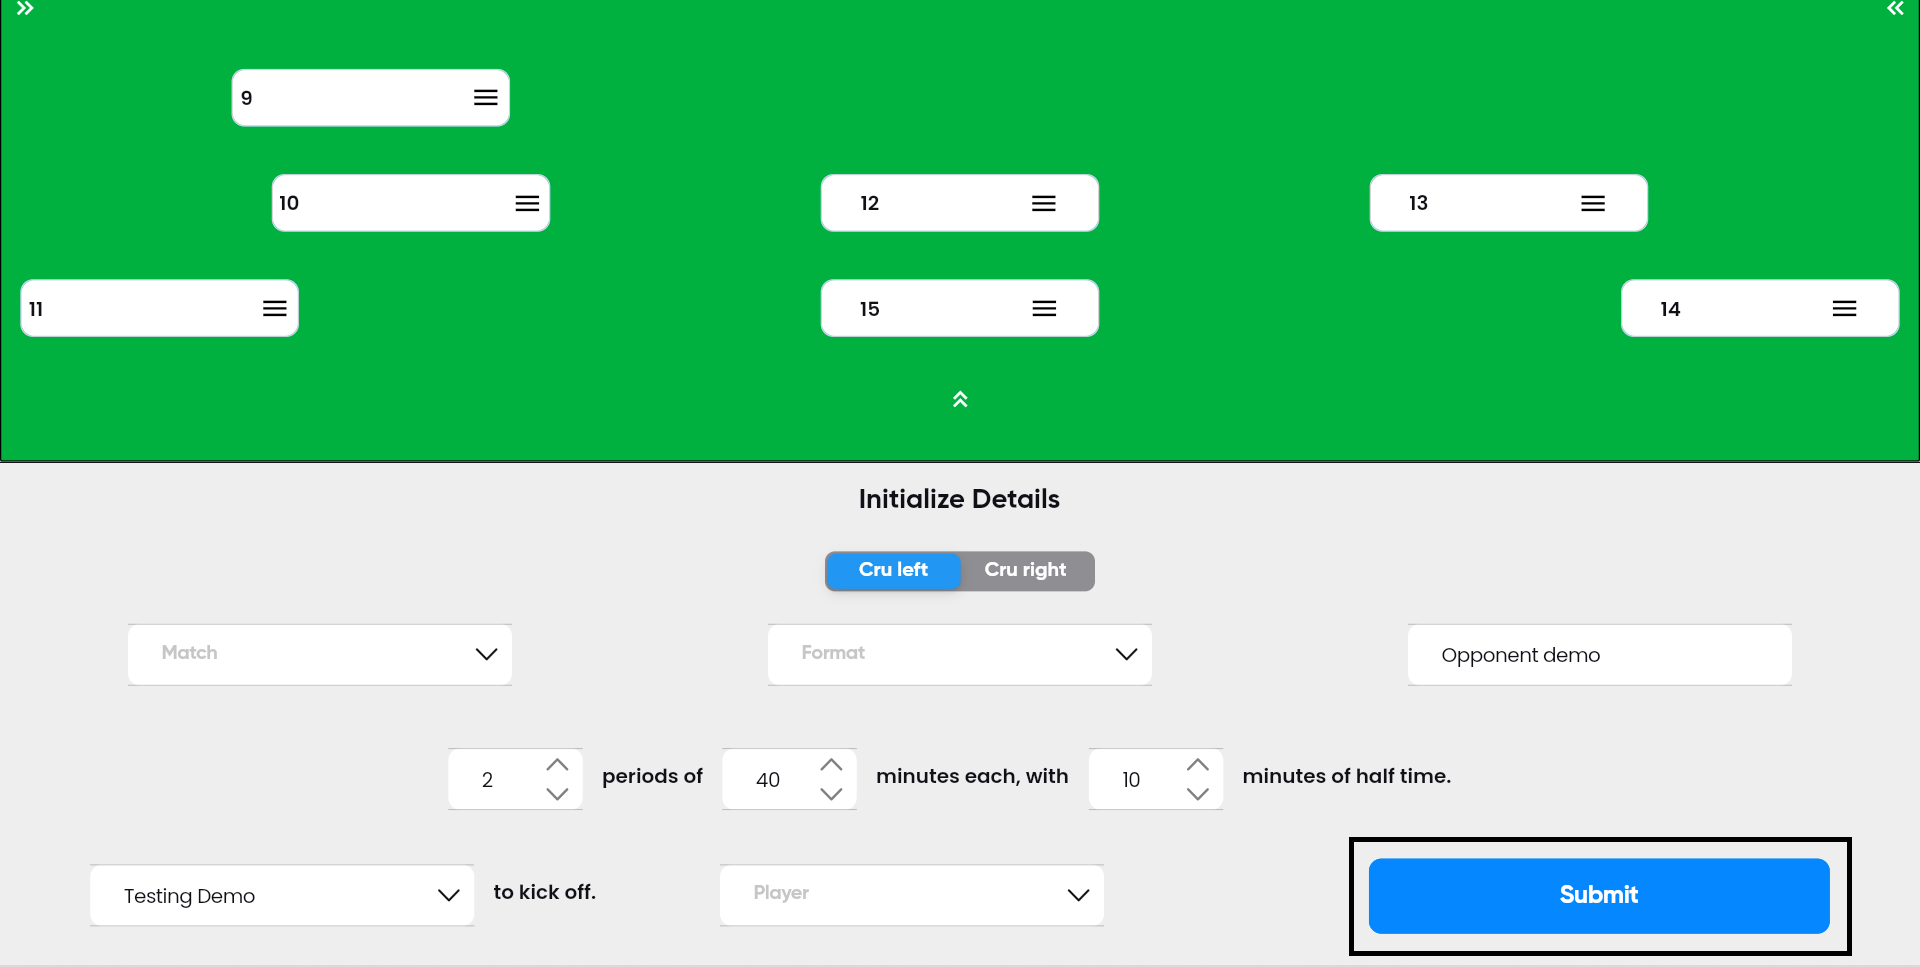
Step-1:
Before the match begins, you must first fill out
the initialization details of the match, with the form located at the bottom of the page.

Step-2:
After completing the initialization details form,
click the "Submit" button. The match will commence only after you have clicked the submit
button.
Step-3:
On the During match screen, you can view the list
of players currently present.
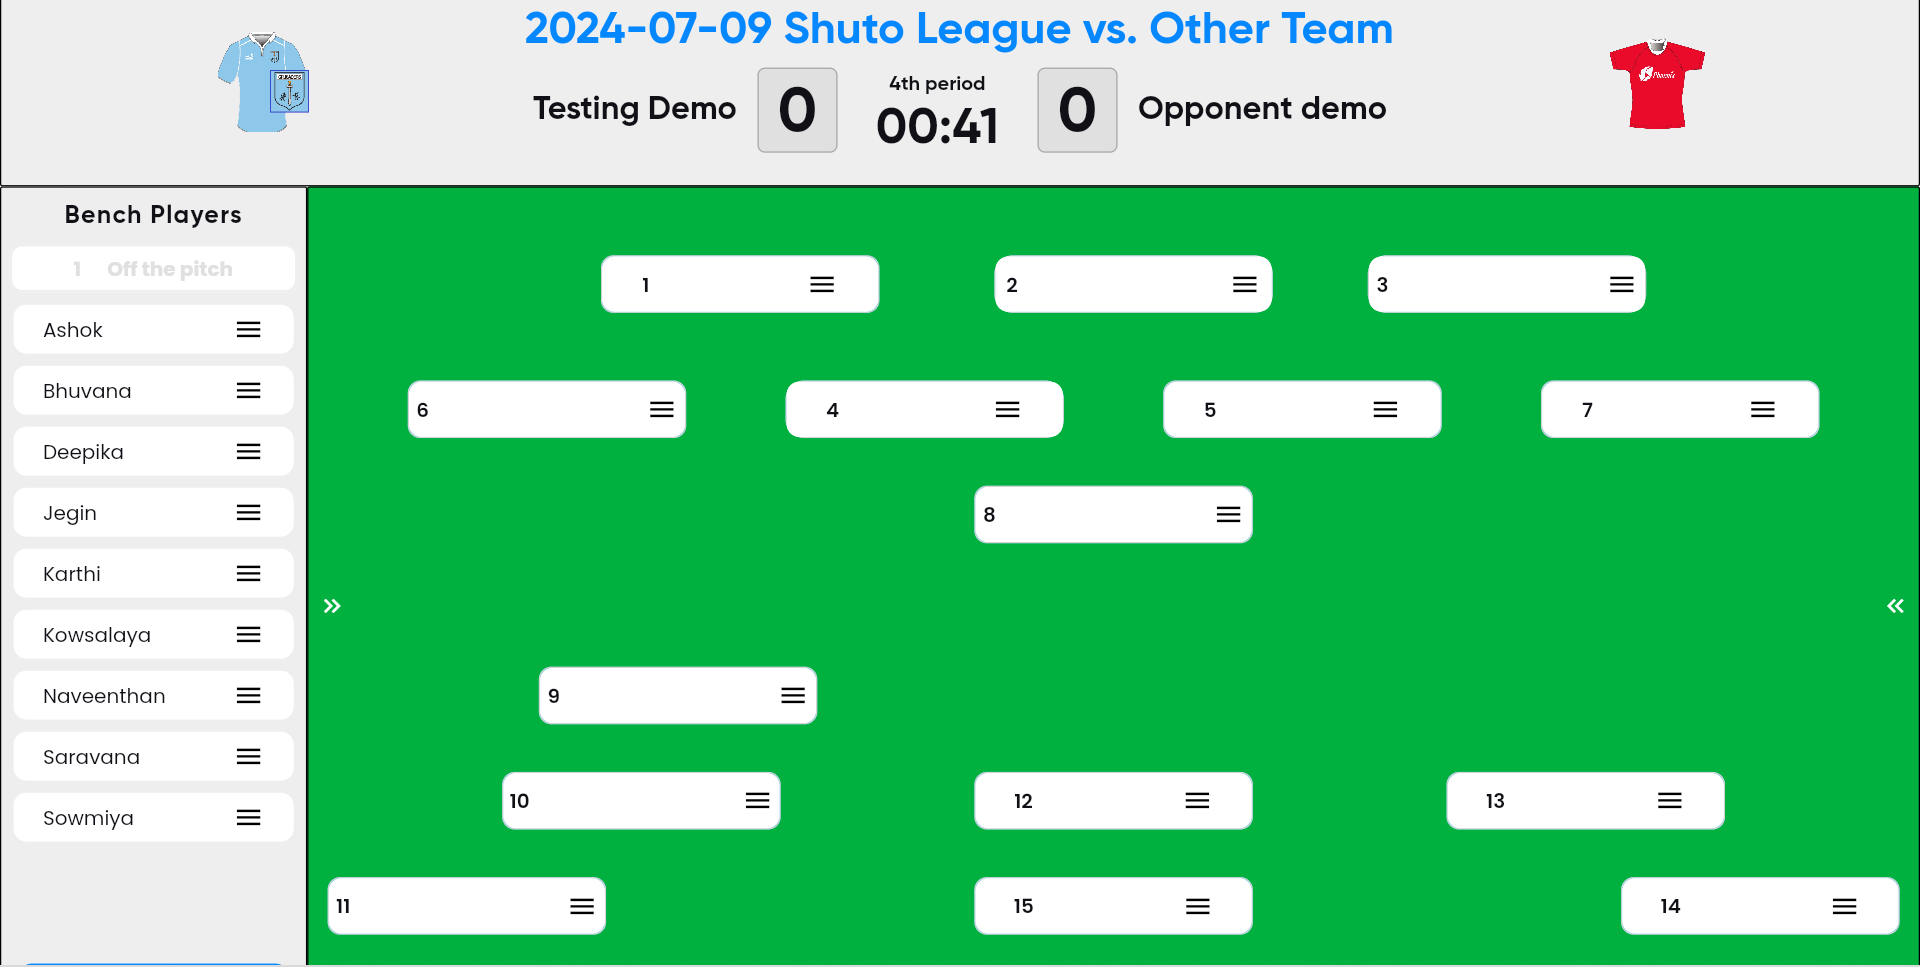
Step-4:
Once step 3 is completed, use the drag-and-drop
format to assign each player to their position for the match.
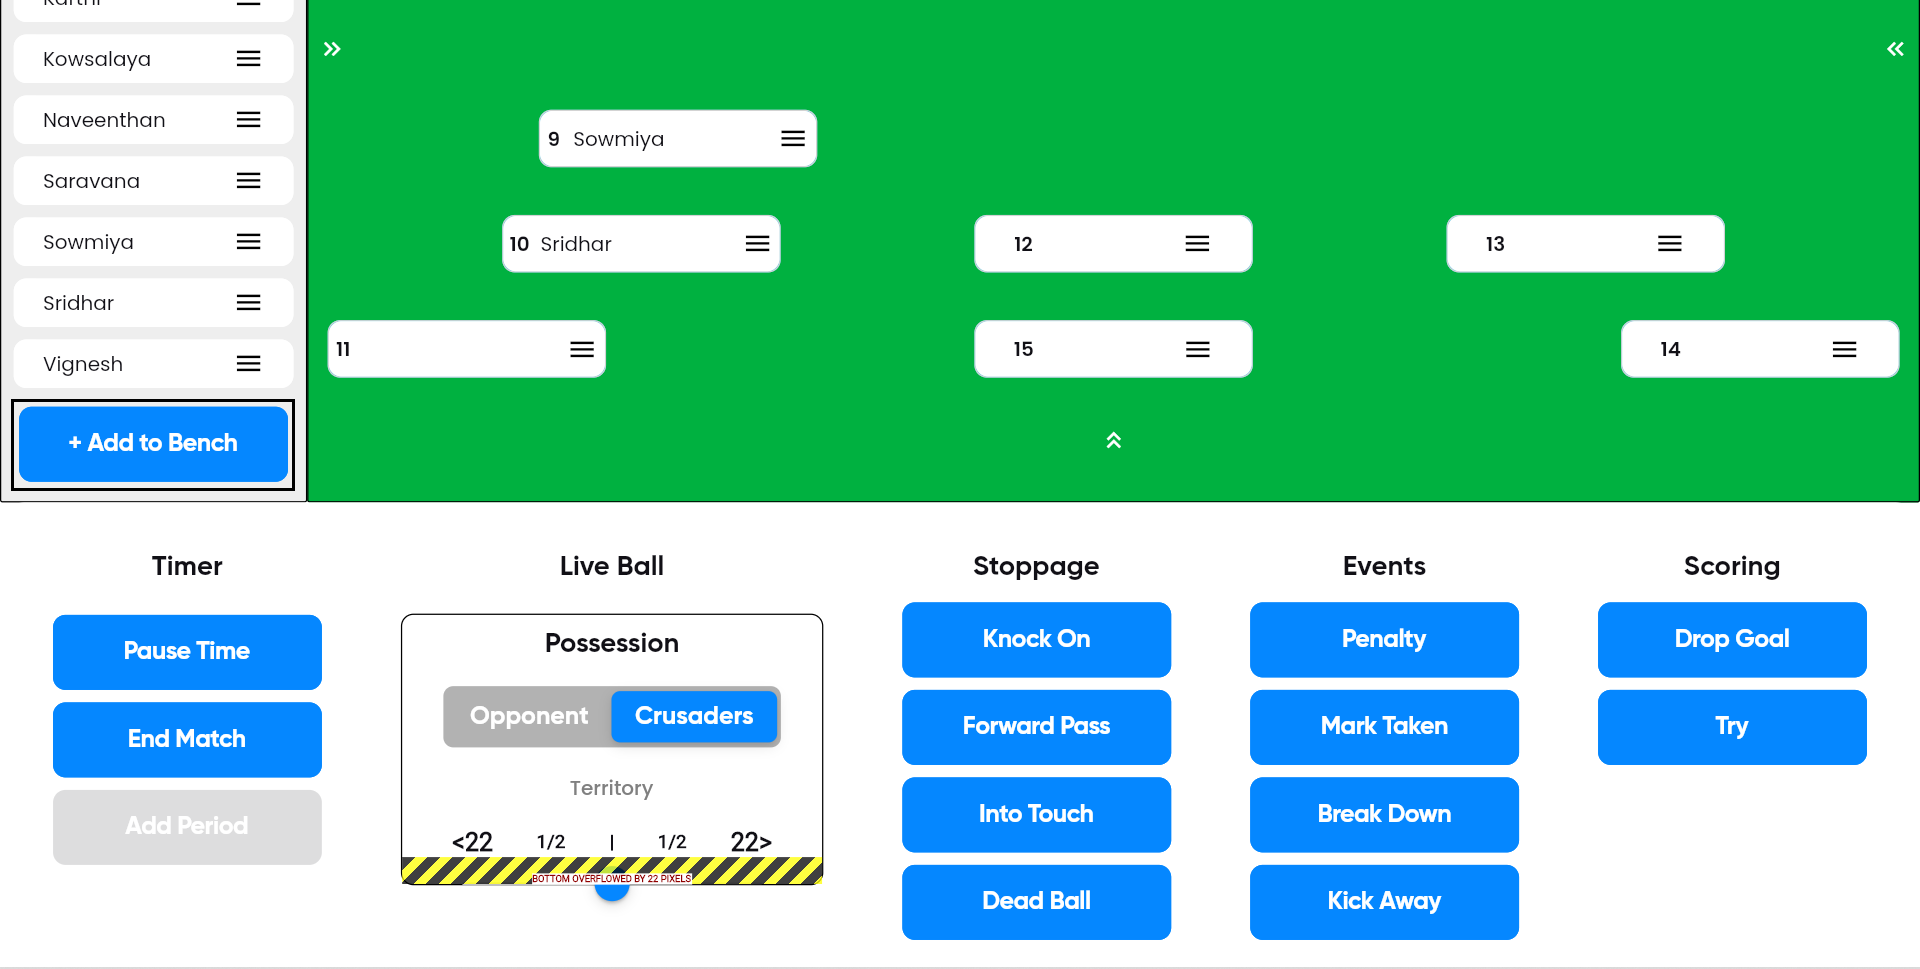
Step-5:
If unexpected players arrive during the match,
click the "Add to Bench" button to include them and assign them a new position.
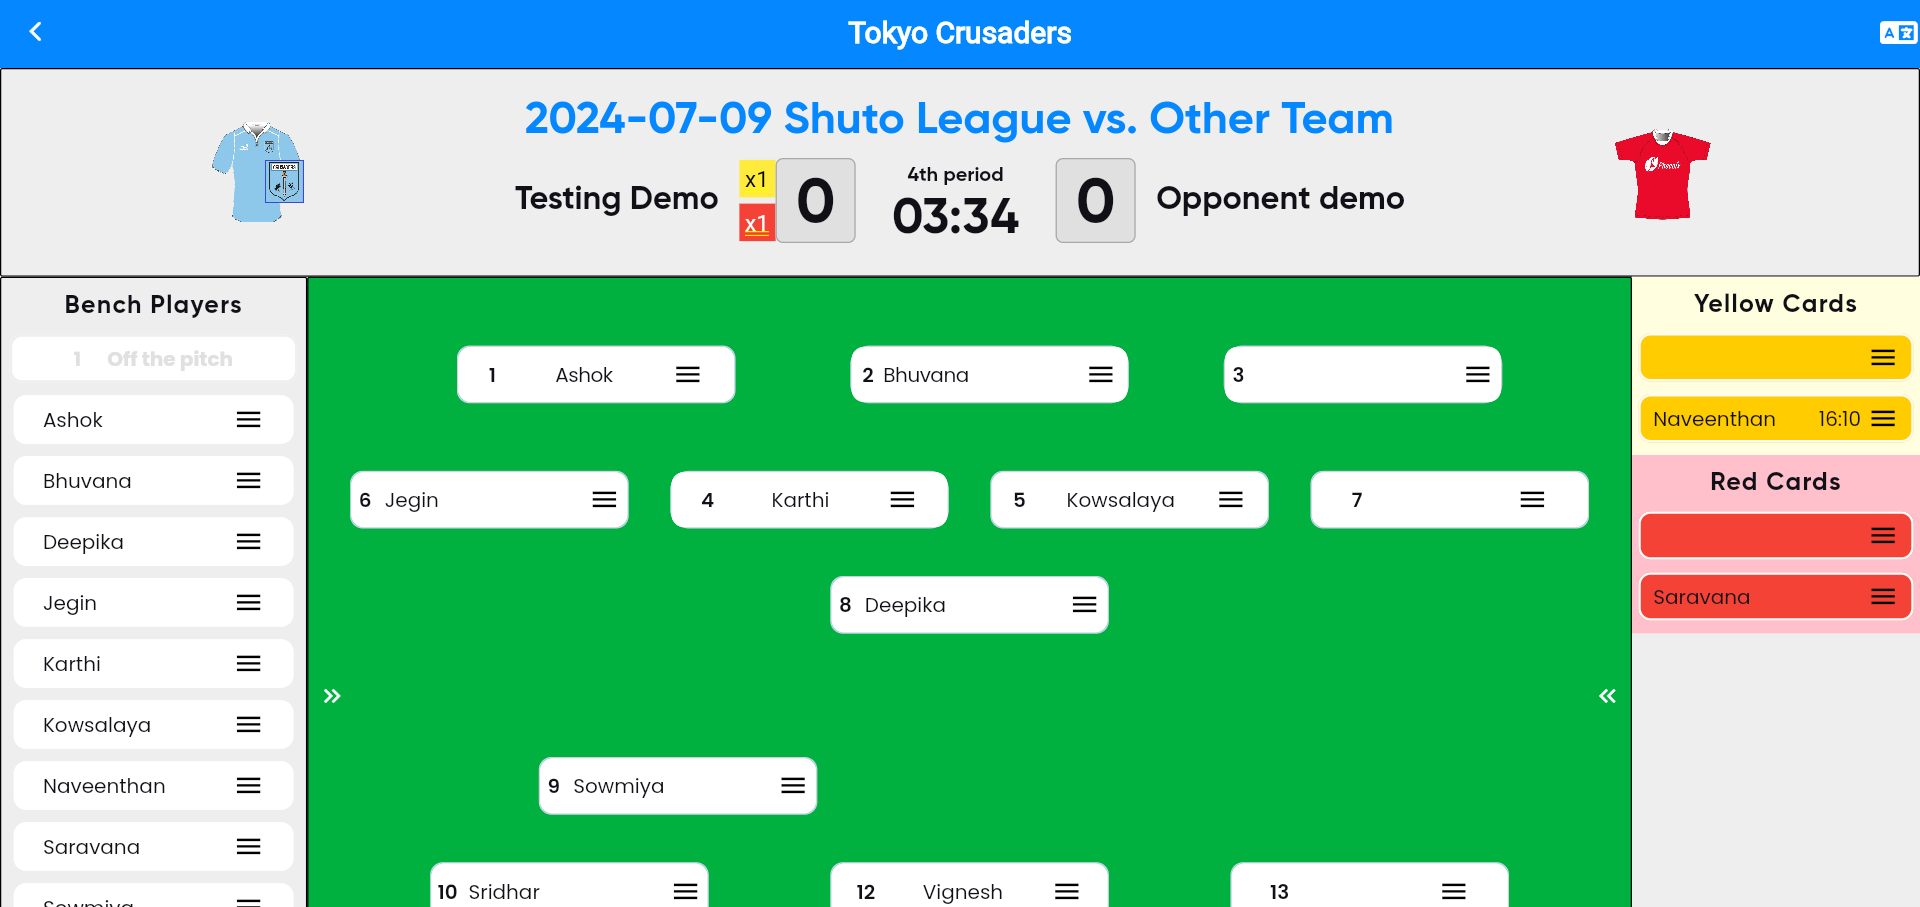
Step-6:
During the match, if a player commits a foul, use
the drag-and-drop format to assign them a yellow card.

Step-7:
During the match, if a player breaks the rules,
use the drag-and-drop format to assign them a red card.

Step-8:
If you need to pause the match suddenly, simply
click the pause button.

Step-9:
If the match continues beyond a specified
duration, click the "End Match" button to conclude the match.
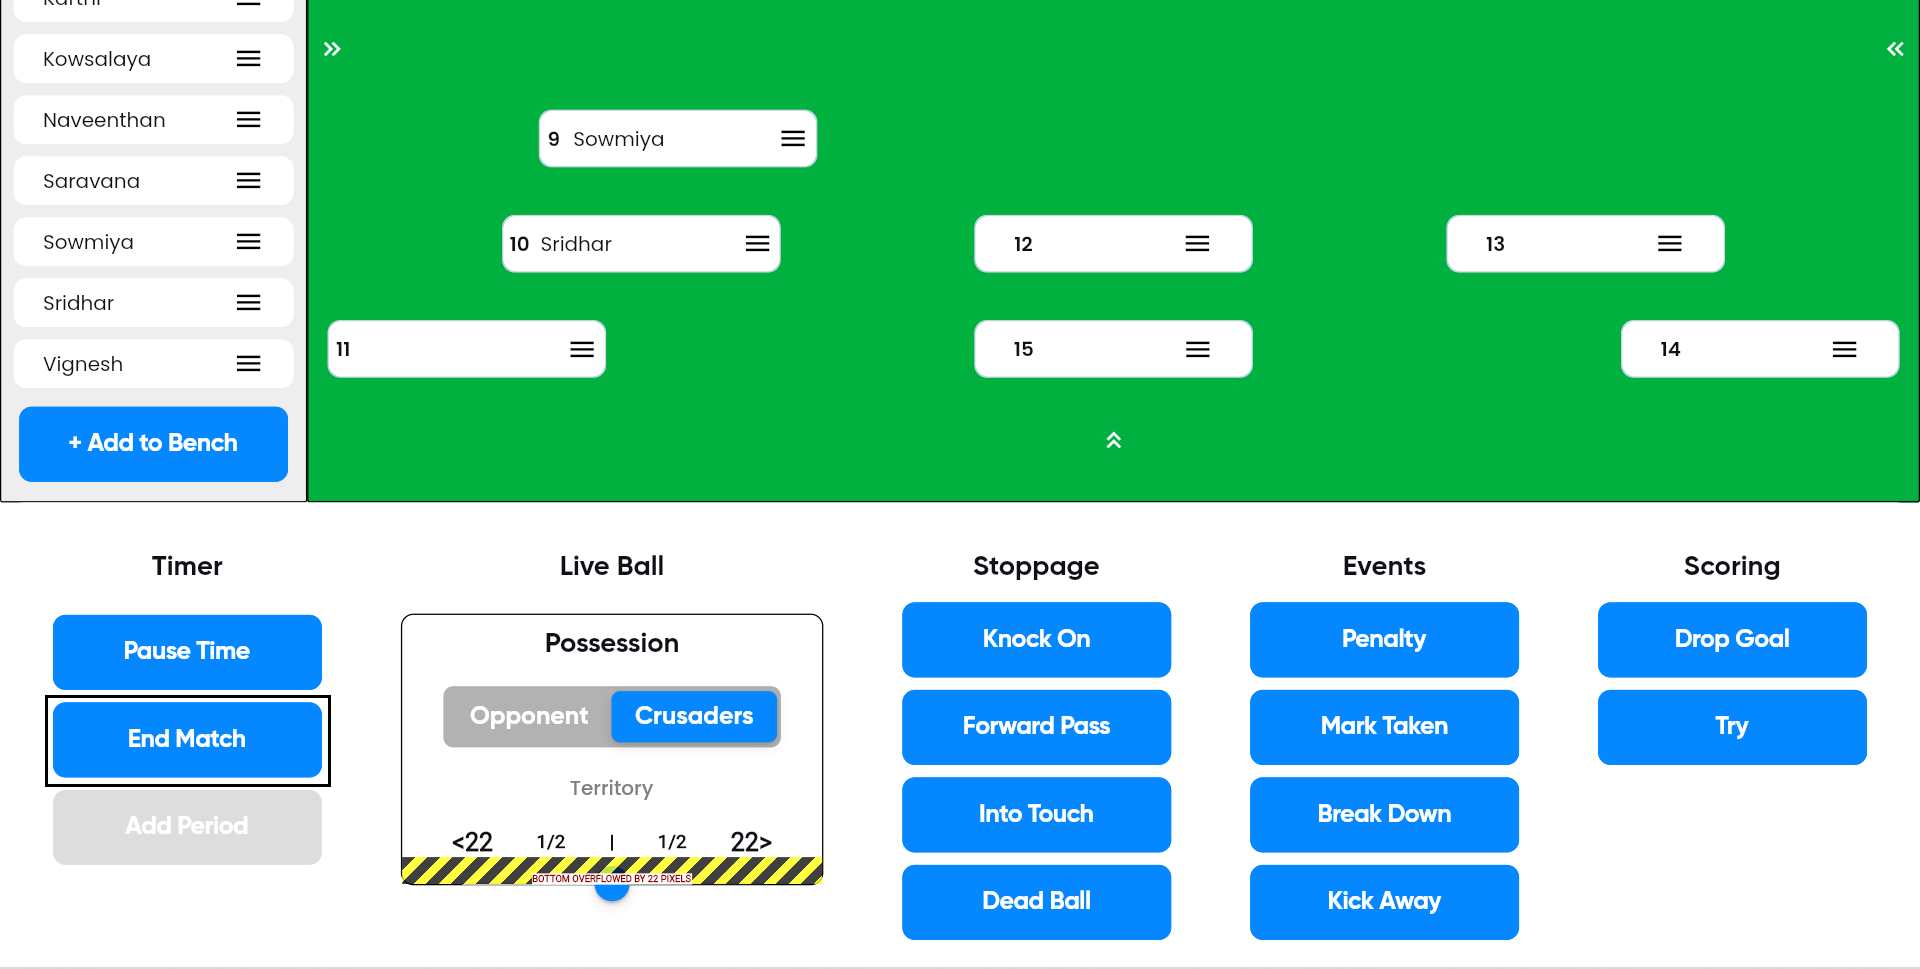
Step-10:
You can view the live ball possession for both
the Crusaders team and the opponent team during the match by clicking on the possession
field button.

Post-Match
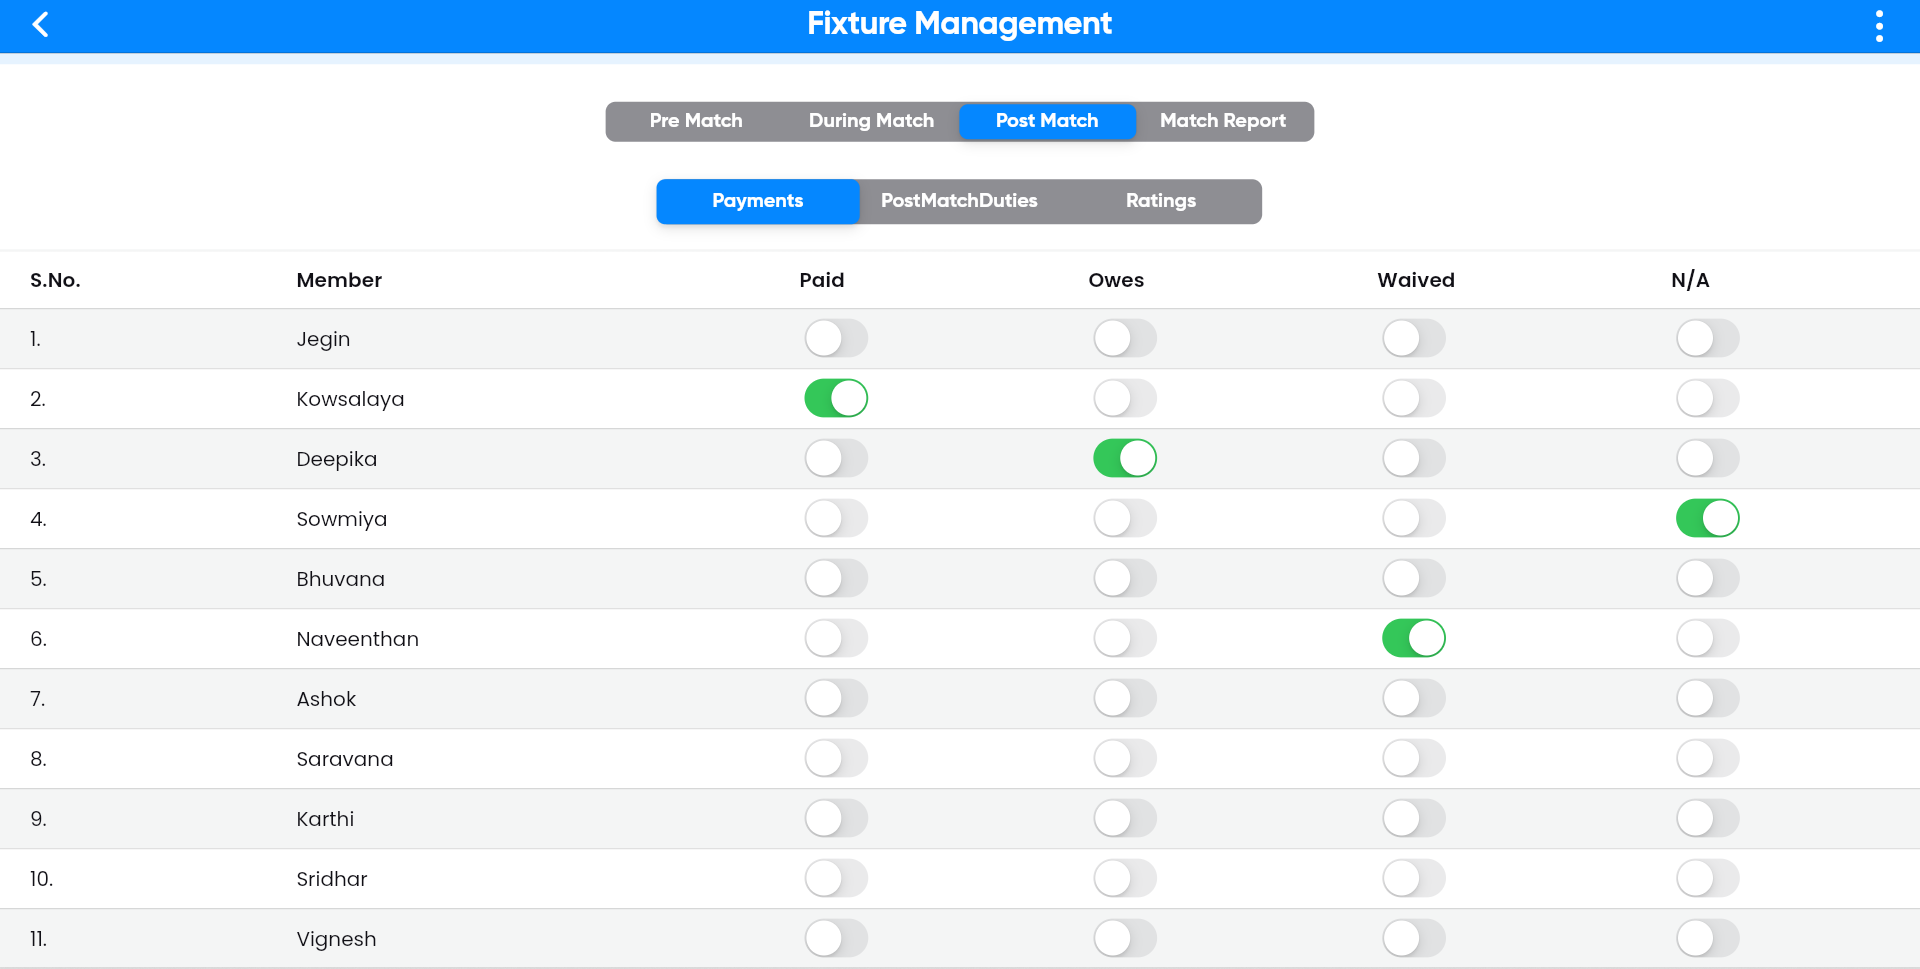
Step-1:
On the payment screen, the details of players who
are paid, owe, waived, or marked as N/A can be viewed by clicking the toggle button next to
each player's name.
Step-2:
On the post-match duties screen, first, assign the
MVP player of the team by clicking on "Crusaders MVP" on the left side of the screen.
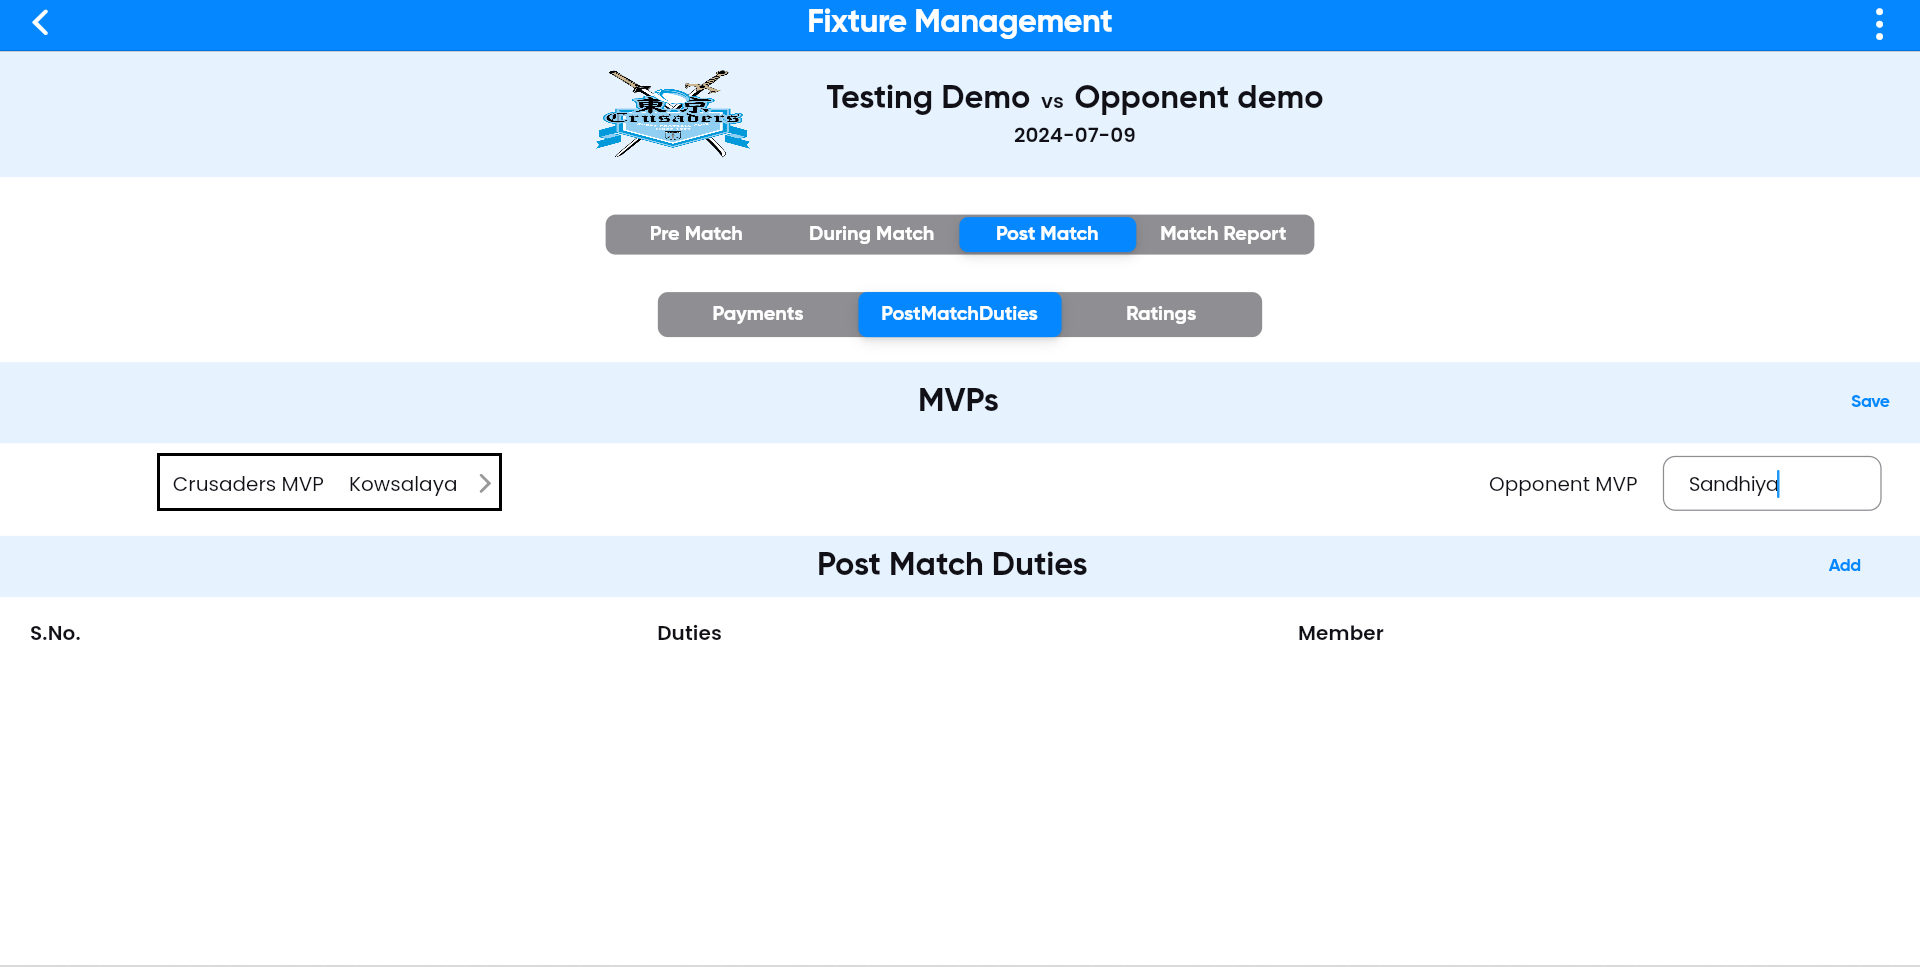
Select the player who earned the MVP title for the match and click the right button. The player's name will then be displayed on the screen.

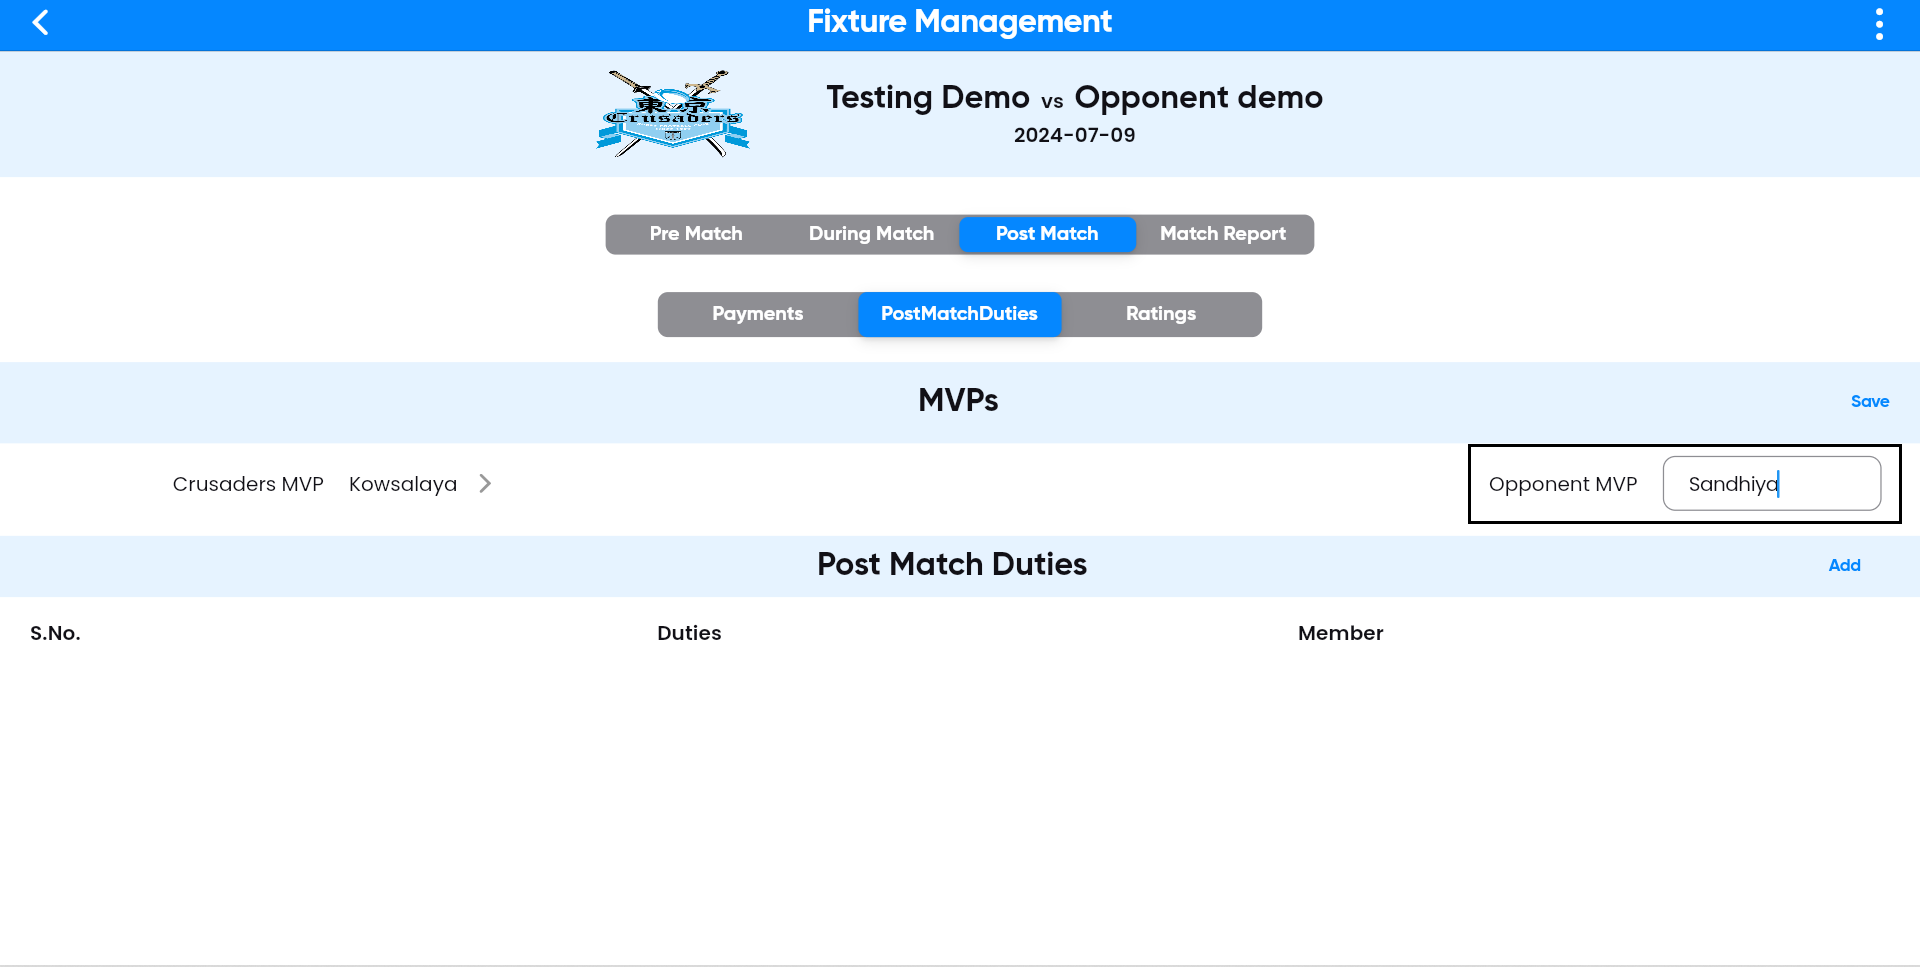
Step-3:
After completing step 2, assign the MVP for the
opponent team by entering the player's name on the right side of the post-match duties
screen.
Step-4:
For the match, assign a duty name and designate a
player to handle the duty by clicking the add button at the bottom left side of the screen.

Step-5:
After completing step 4, assign a player name and
match duty.

Click the tick button

Step-6:
The post-match duties screen displays the added
duties and player name.

Step-7:
On the ratings screen, assign a referee rating for
the match by clicking on the number from one to ten displayed on the screen.

Step-8:
Assign player ratings by clicking on their names
using the toggle buttons: give them three, two, or one stars accordingly.

Step-9:
On the match report page screen, you can only view
the match events, kick-pass-run, and attacking reports.

Referee
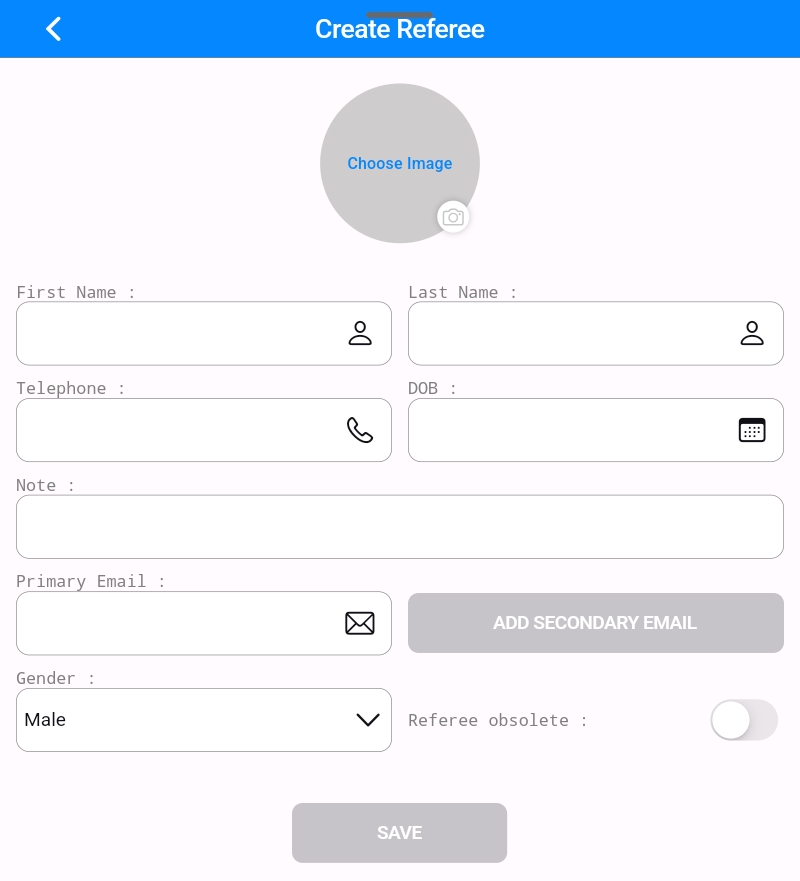
Step-1:
In the People/Places section, you can create a new
referee for matches by clicking the "+" button in the Referee section.

Step-2:
Enter the referee's name and email ID, then click the save button.
Step-3:
The newly created referee will appear on the referee
page screen.

Settings
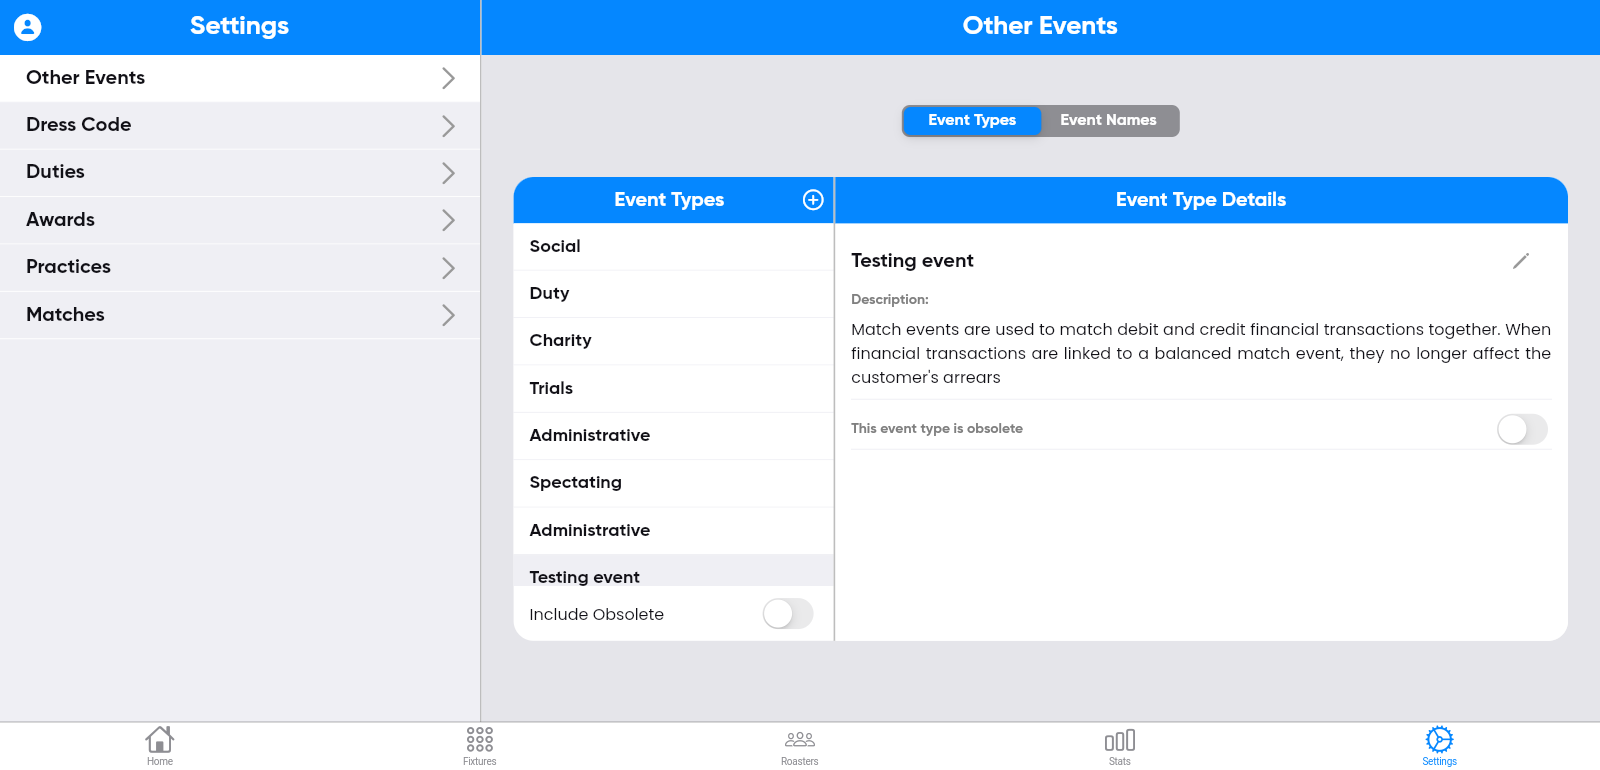
Step-1:
To create a new event type, click on the "Other
Events" button on the left side menu bars, and then click on the "Event Type" button on the
right side of the screen.

Step-2:
On the event type screen, click on the "+" symbol.

To create a new event type, and then click save.

Step-3:
The entered information will be displayed on the
right side of the screen.

Step-4:
You can edit event Type by clicking the edit symbol
on the right side of the screen.

Updating the information, and then clicking save.
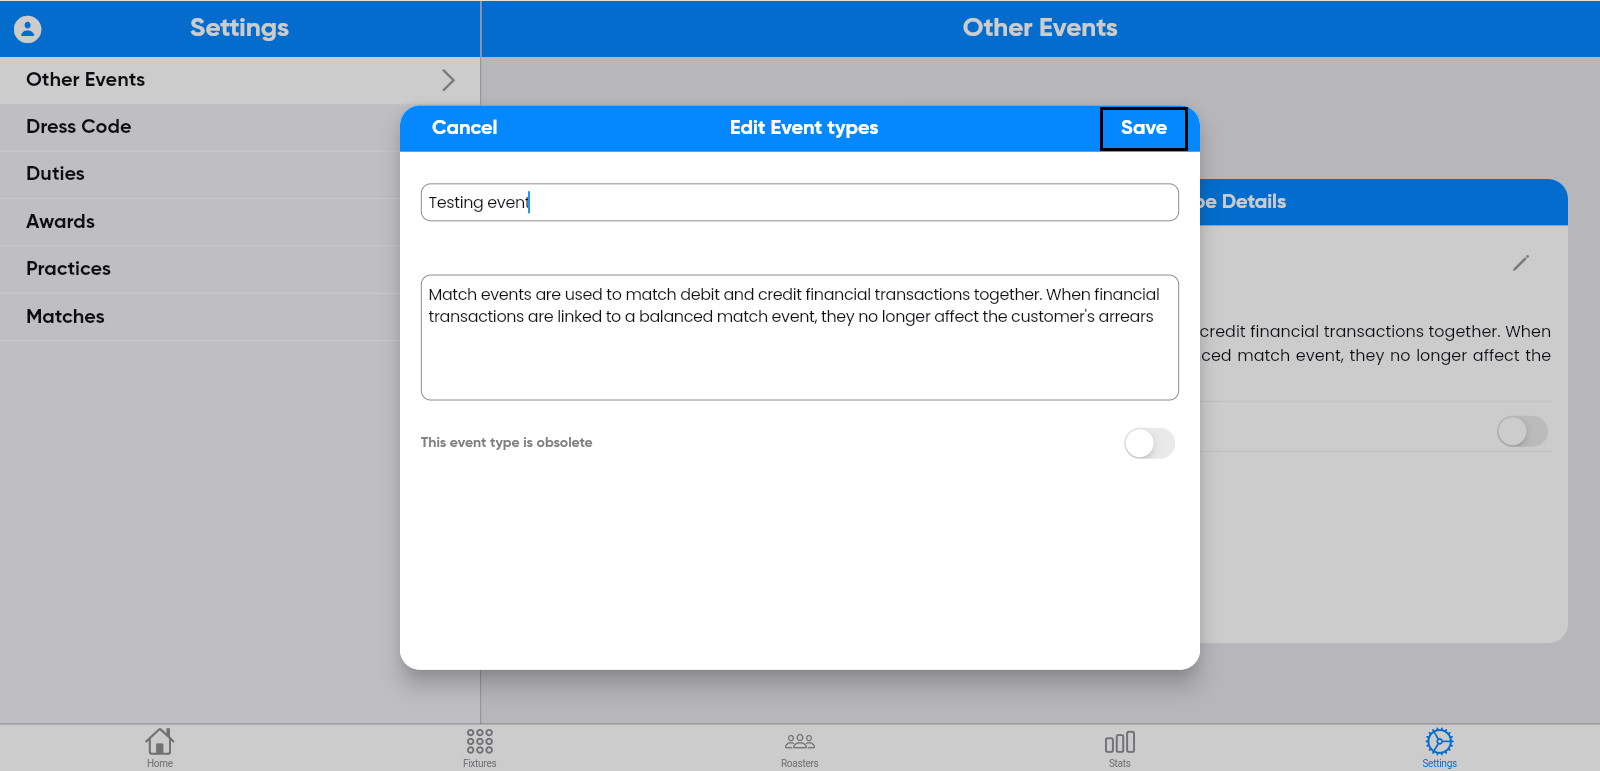
The updated information will be displayed on the screen.
Step-5:
To create a new event name, click on the event name
button.click the "+" symbol.

to create a new event, and finally, click save.

Step-6:
You can edit event names by clicking the edit symbol
on the right side of the screen.

to create a new event, and finally, click save.

The updated information will be displayed on the screen.

Step-7:
To create a dress code, click on the "Dress Code"
button in the left side menu bars.
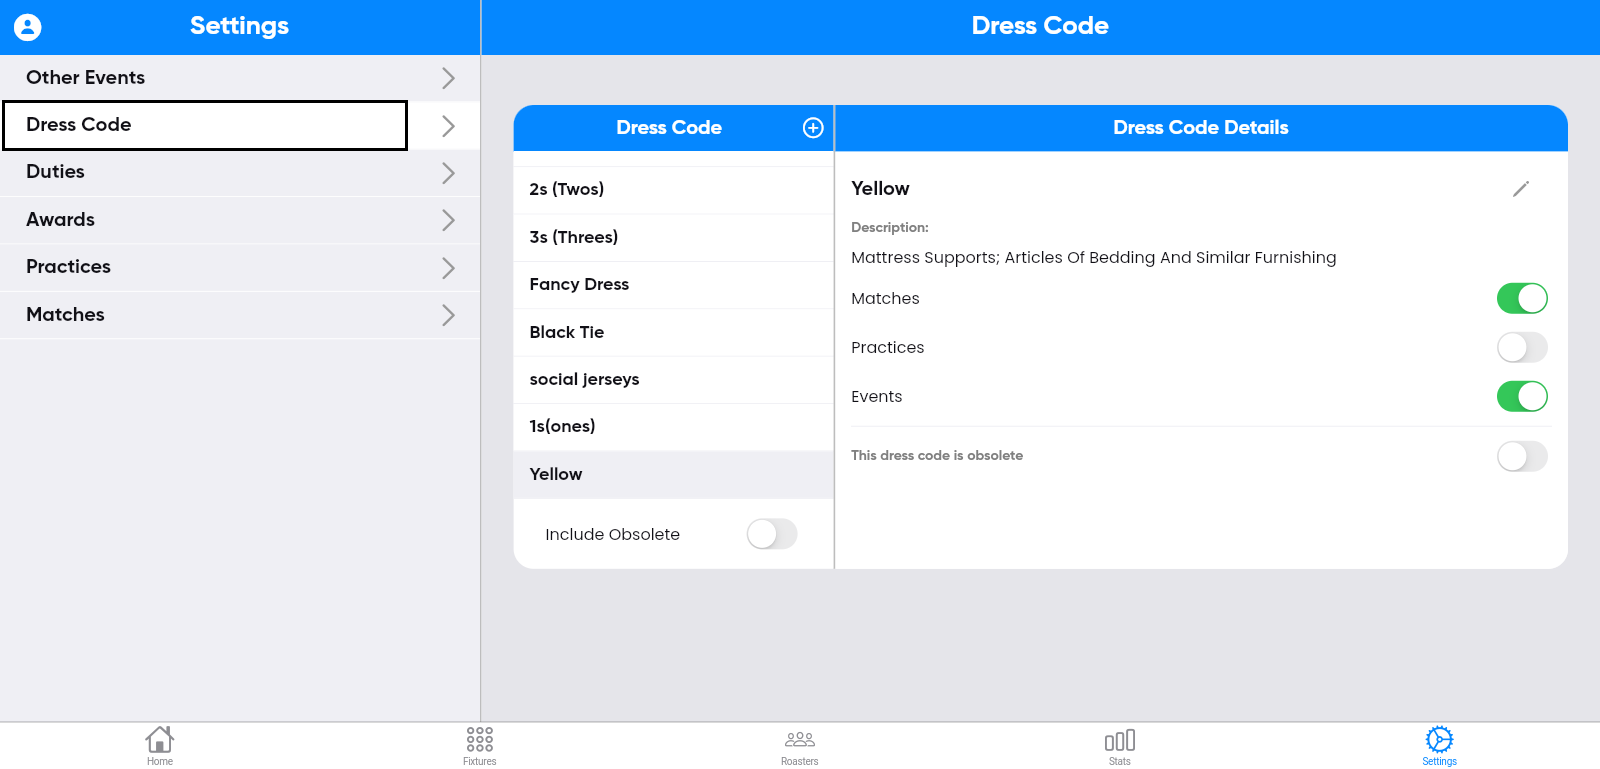
Step-8:
Once step 7 is complete, click the "+" symbol

To create a new dress code, and then save it.
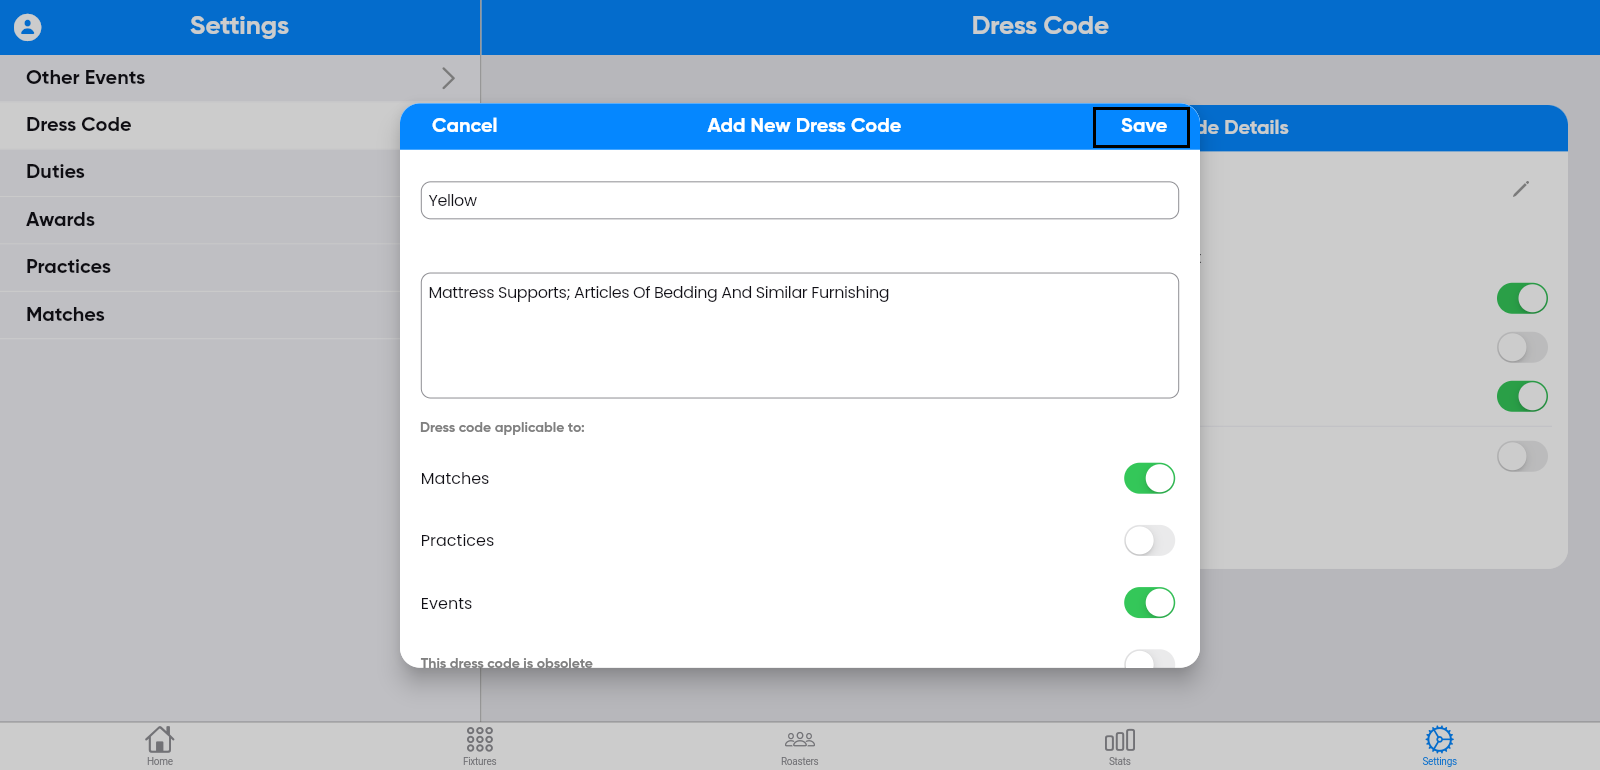
The saved dress code will appear on the screen.
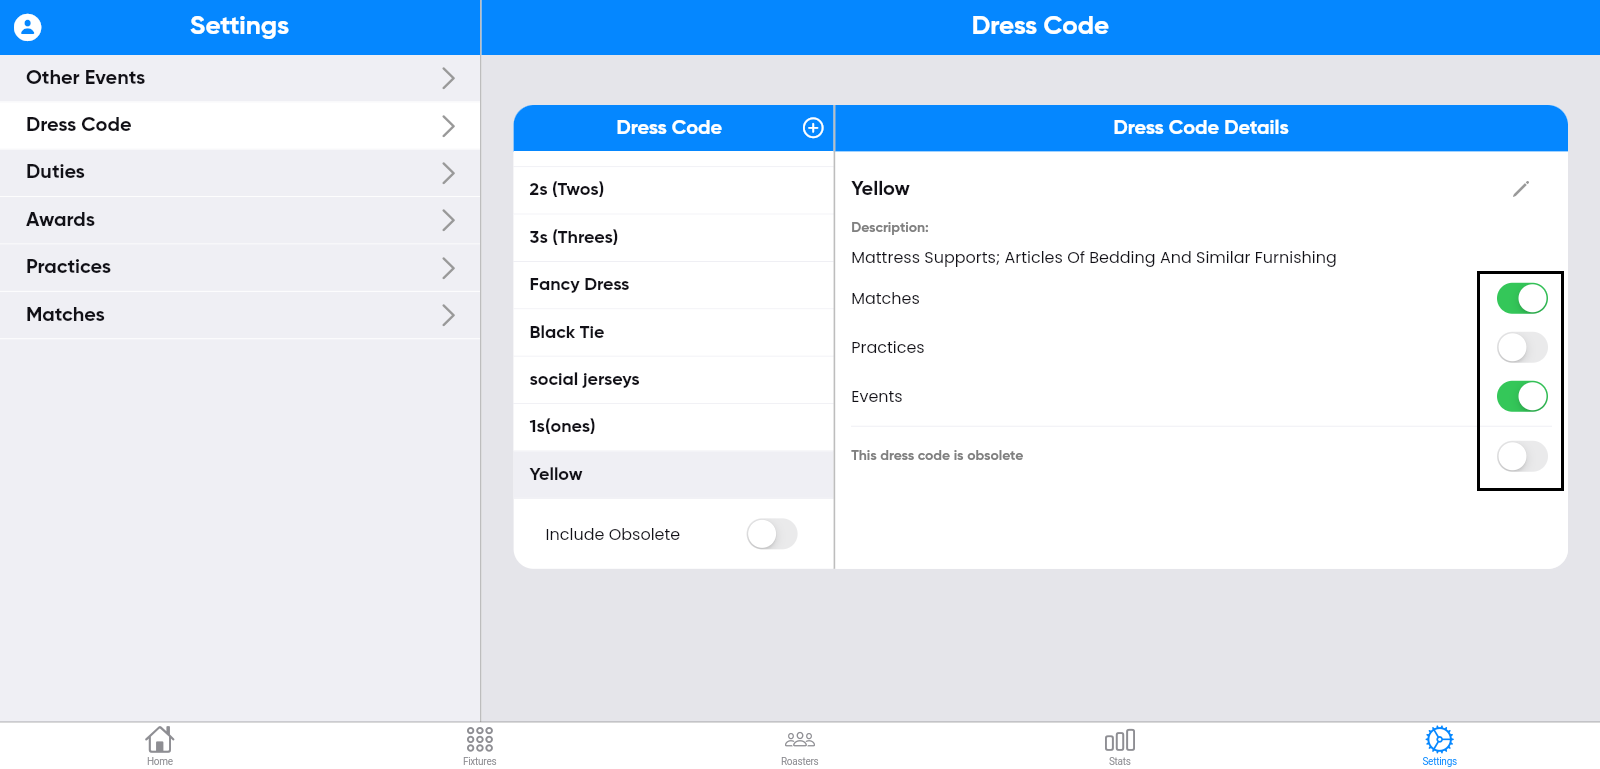
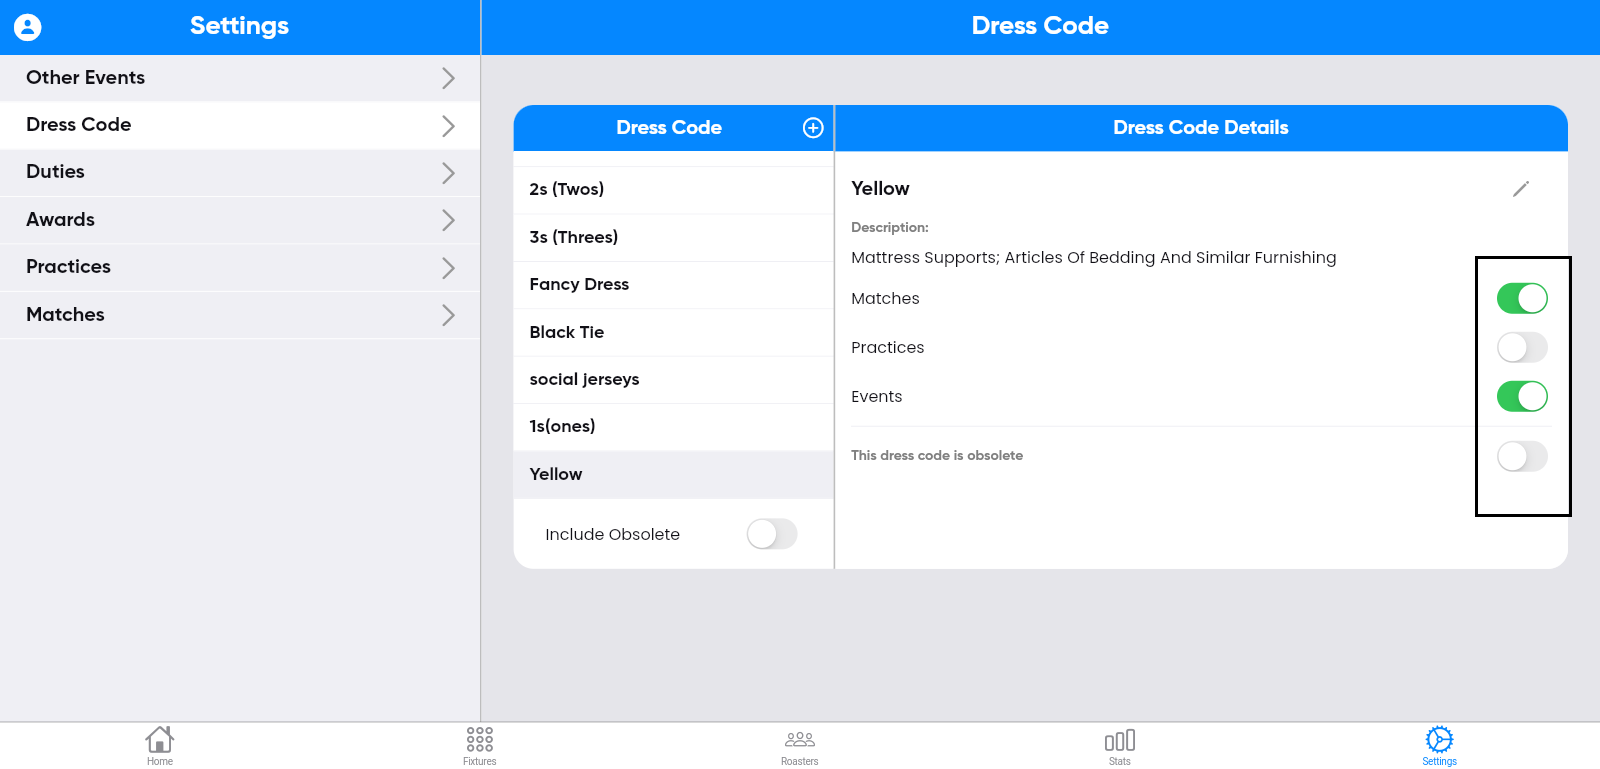
Step-9:
The saved dress code will appear in the pre-match
dress code field when you click the toggle button for the match. You can also assign the
dress code for the respective match and events.
Step-10:
You can edit dress code by clicking the edit symbol
on the right side of the screen.
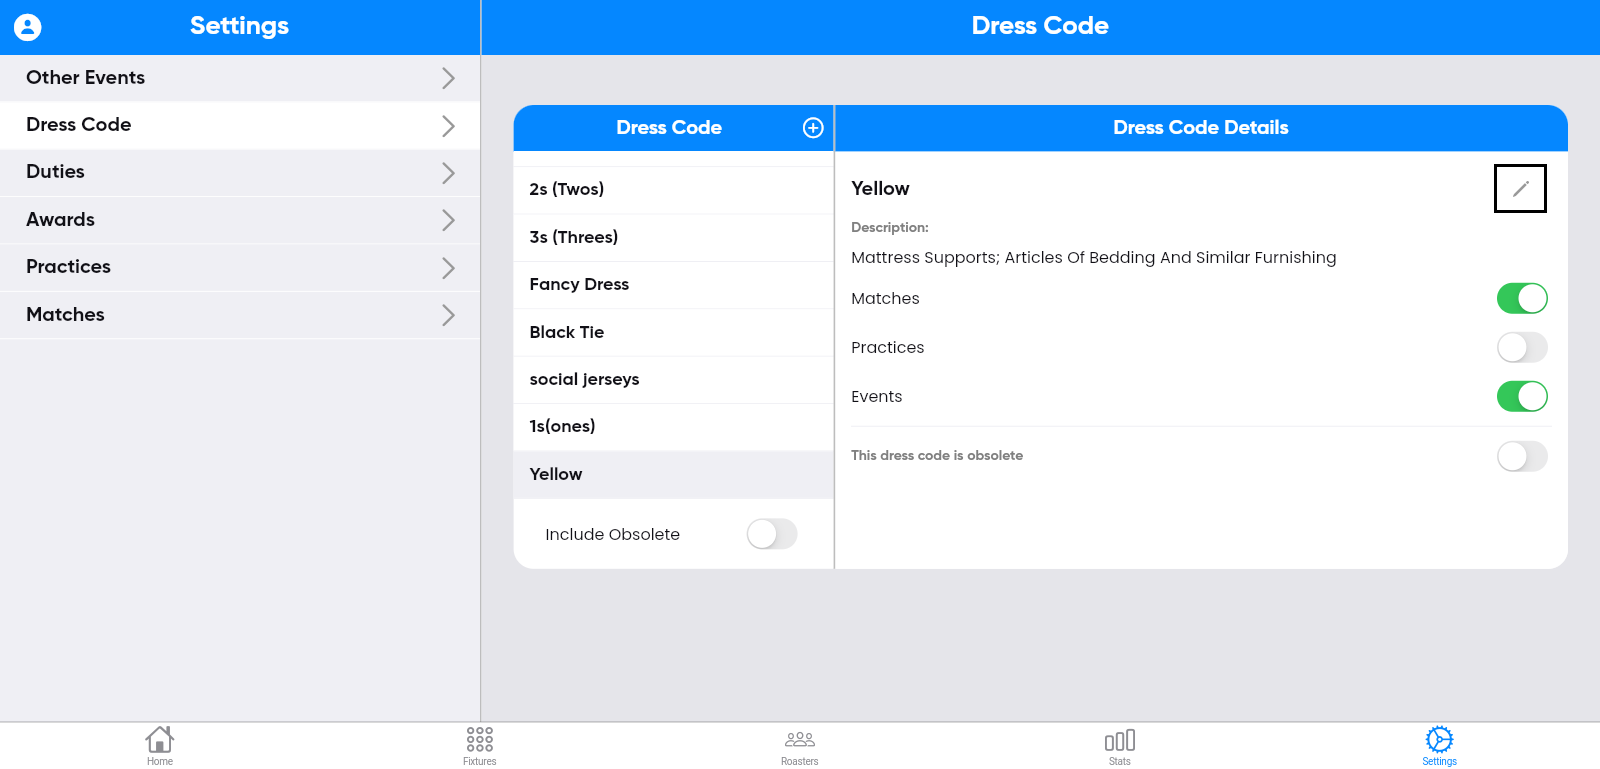
Updating the information, and then clicking save.

The updated information will be displayed on the screen.

Step-11:
To create a post-match duty, select the "Duties"
button on the left side of the screen.

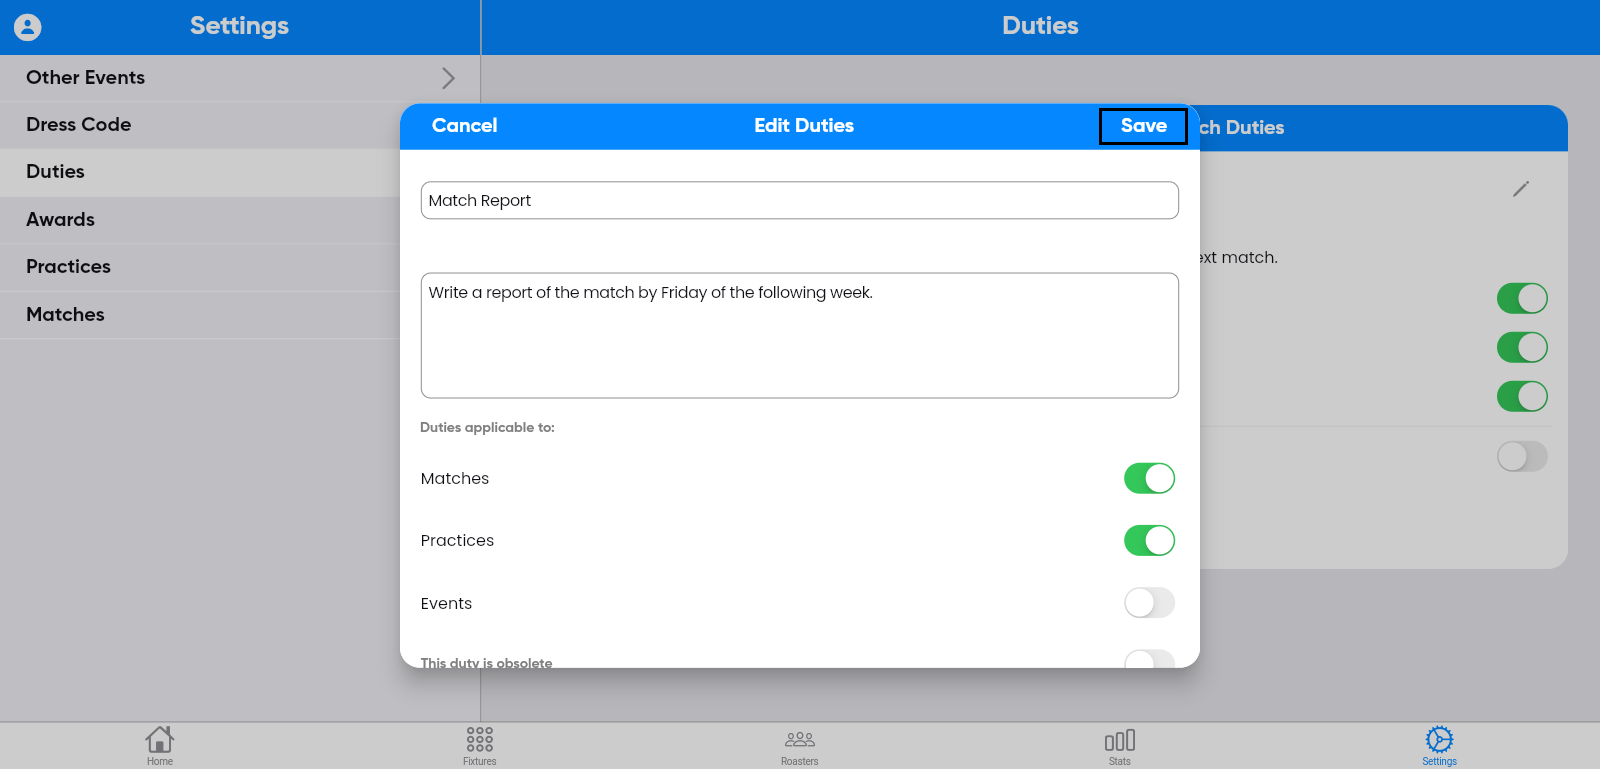
Step-12:
After completing step 11, click the "+" symbol on
the screen.

fill in the details, and then click save.

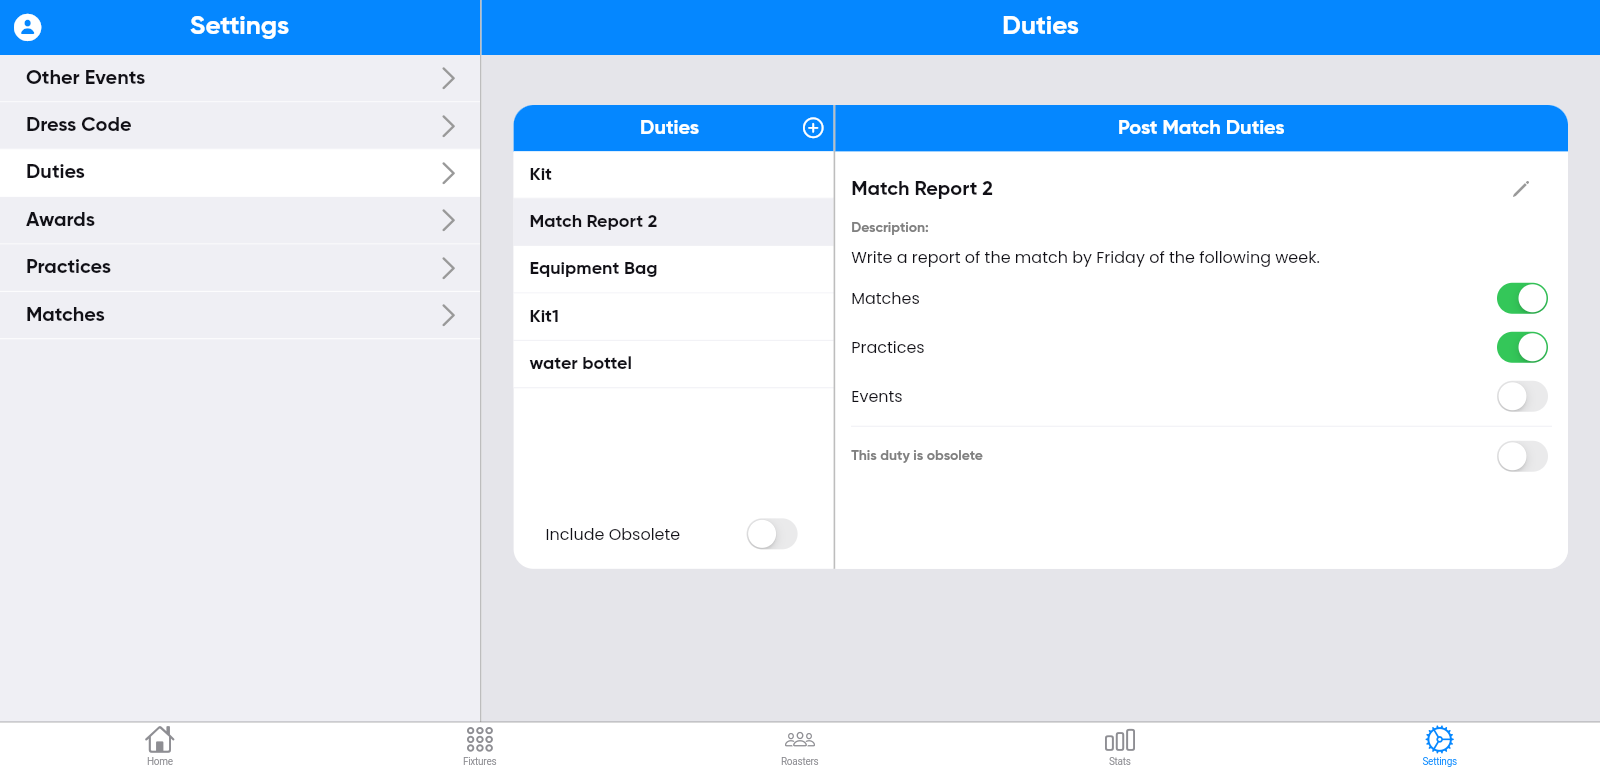
Step-13:
The entered duties information will be displayed on
the screen.

Step-14:
The saved duties will appear in the post-match
duties form when you click the toggle button for the match. You can also assign the duties
for the respective match and events.

Step-15:
You can edit Duties by clicking the edit symbol on
the right side of the screen.

Updating the information, and then clicking save.
The updated information will be displayed on the screen.
Step-16:
To create awards, select the "Awards" button on the
left side of the screen.

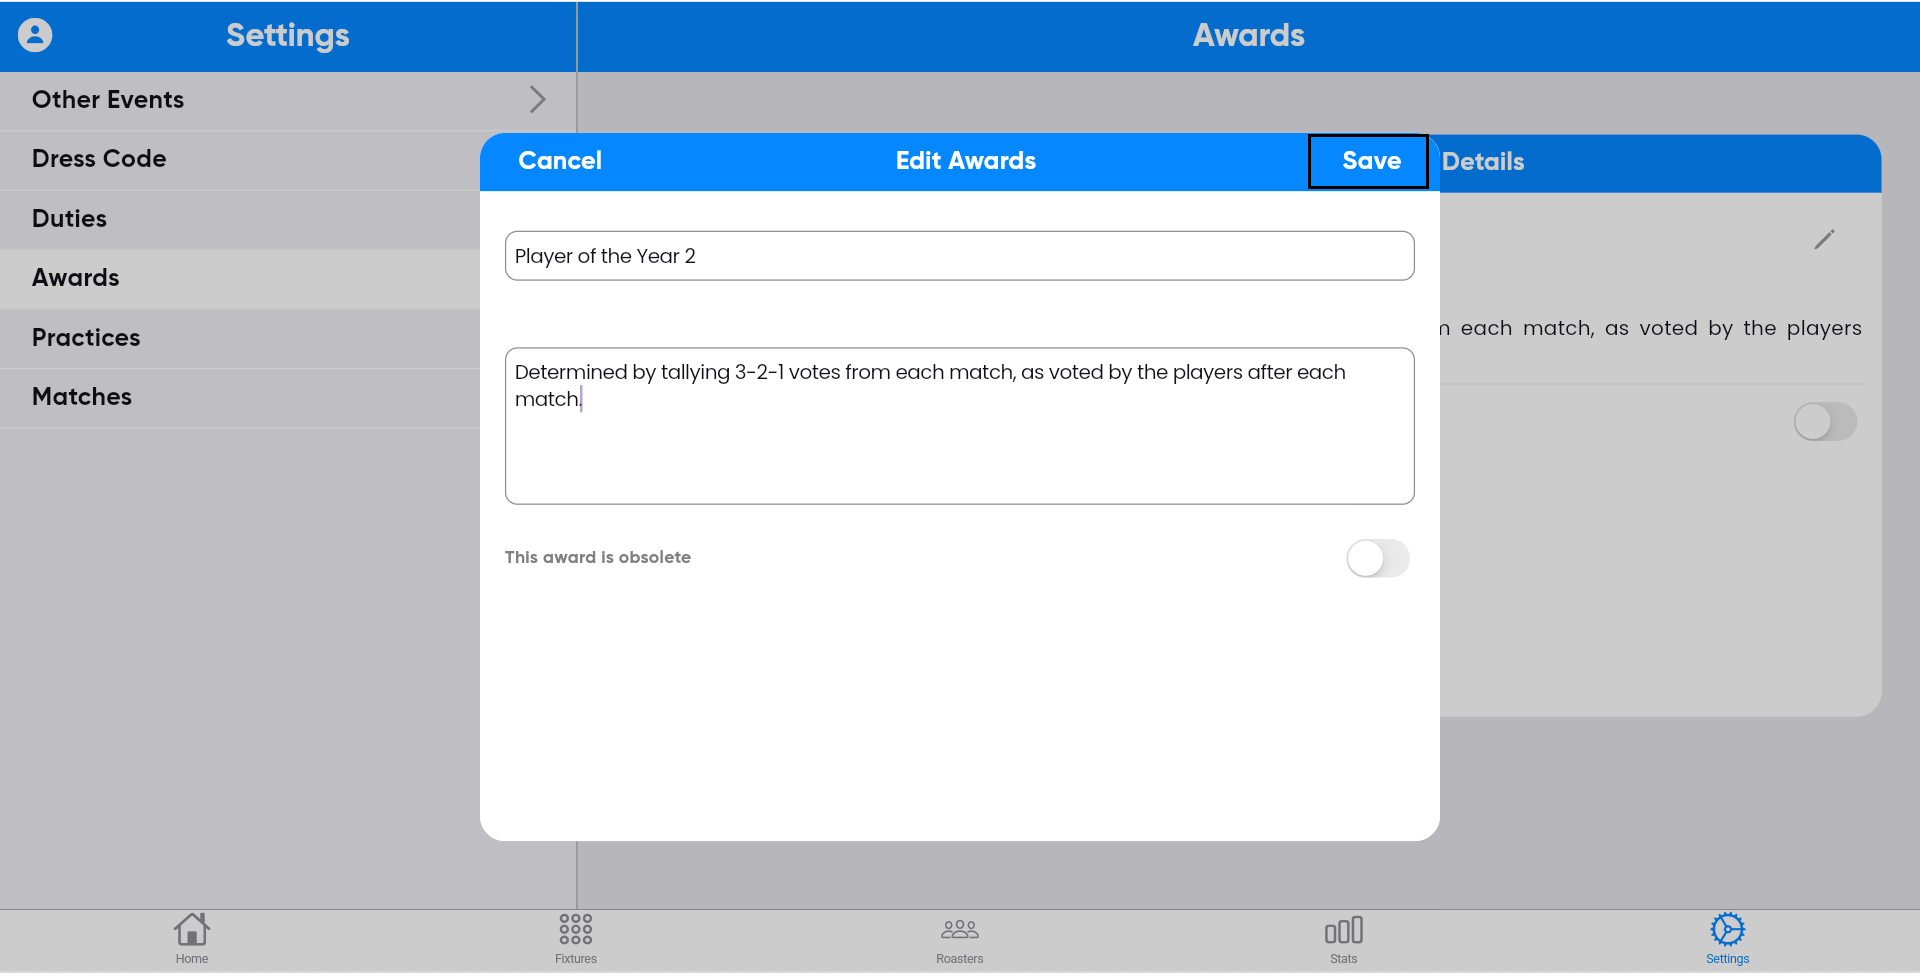
Step-17:
After completing step 16, click the "+" symbol on
the screen.

Enter the details, and then click save.

Step-18:
The entered Awards information will be displayed on
the screen.

Step-19:
You can edit Awards by clicking the edit symbol on
the right side of the screen.

Updating the information, and then clicking save.
The updated information will be displayed on the screen.

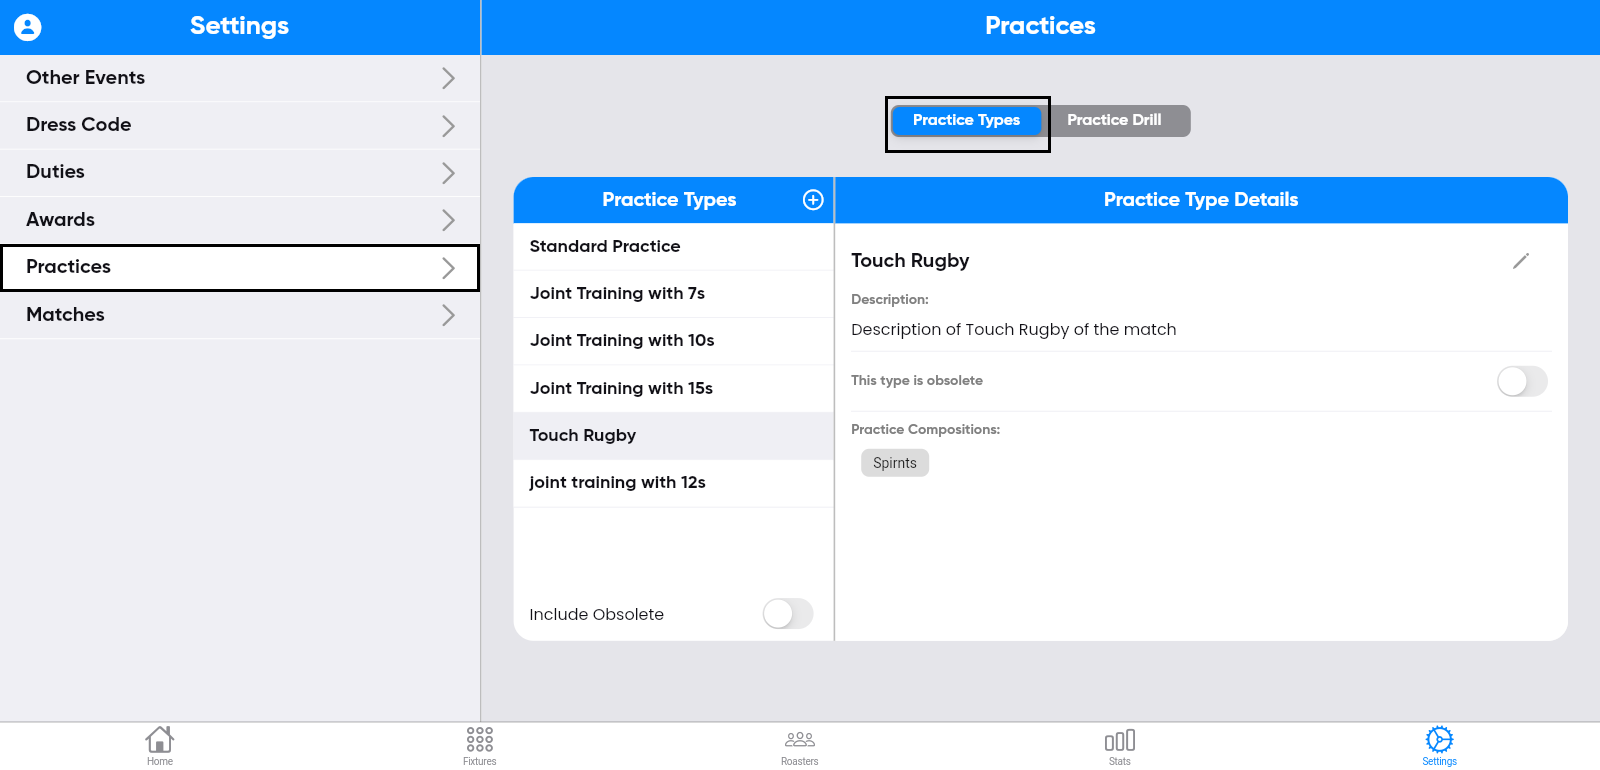
Step-20:
To create Practice Types, select the " Practice
Types " button on the left side of the screen.
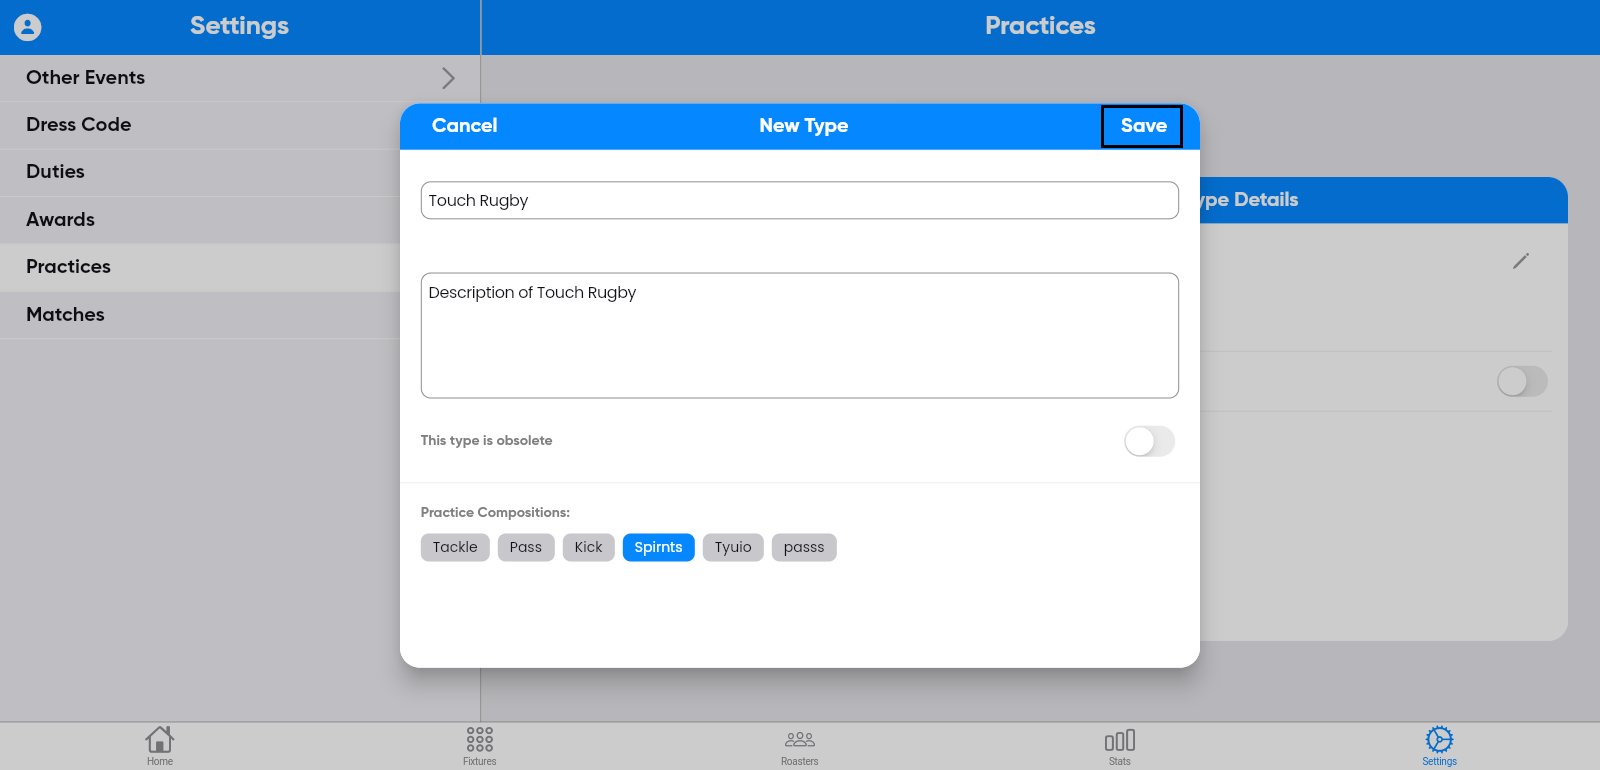
Step-21:
After completing step 20, click the "+" symbol on
the screen.

Enter the details, and then click save.
Step-22:
The entered Practice types information will be
displayed on the screen.
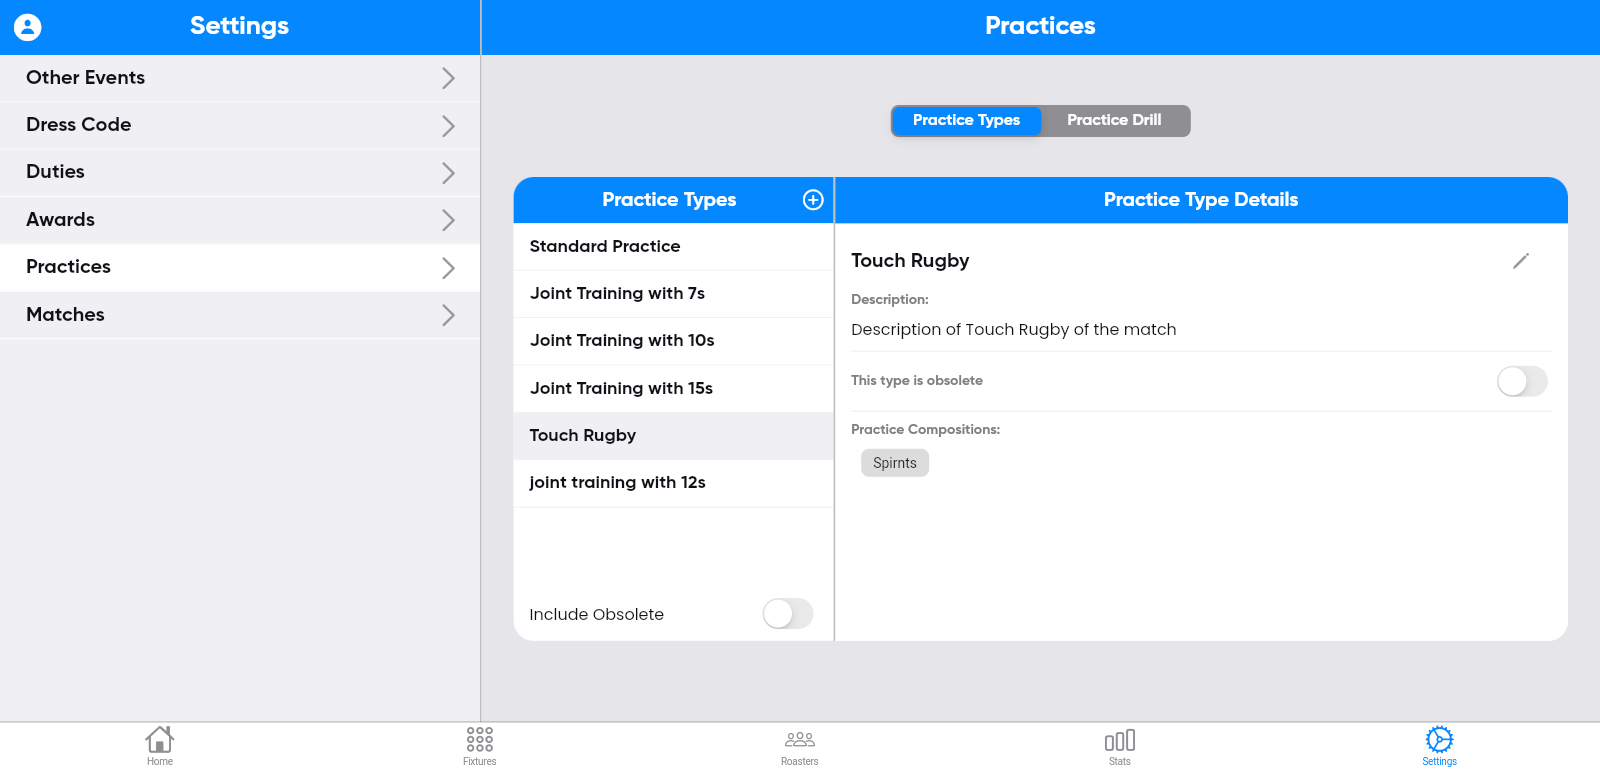
Step-23:
You can edit Practice types by clicking the edit
symbol on the right side of the screen.

Updating the information, and then clicking save.

The updated information will be displayed on the screen.

Step-24:
To create Practice drill, select the " Practice
Drill" button on the left side of the screen

Step-25:
After completing step 24, click the "+" symbol on
the screen.
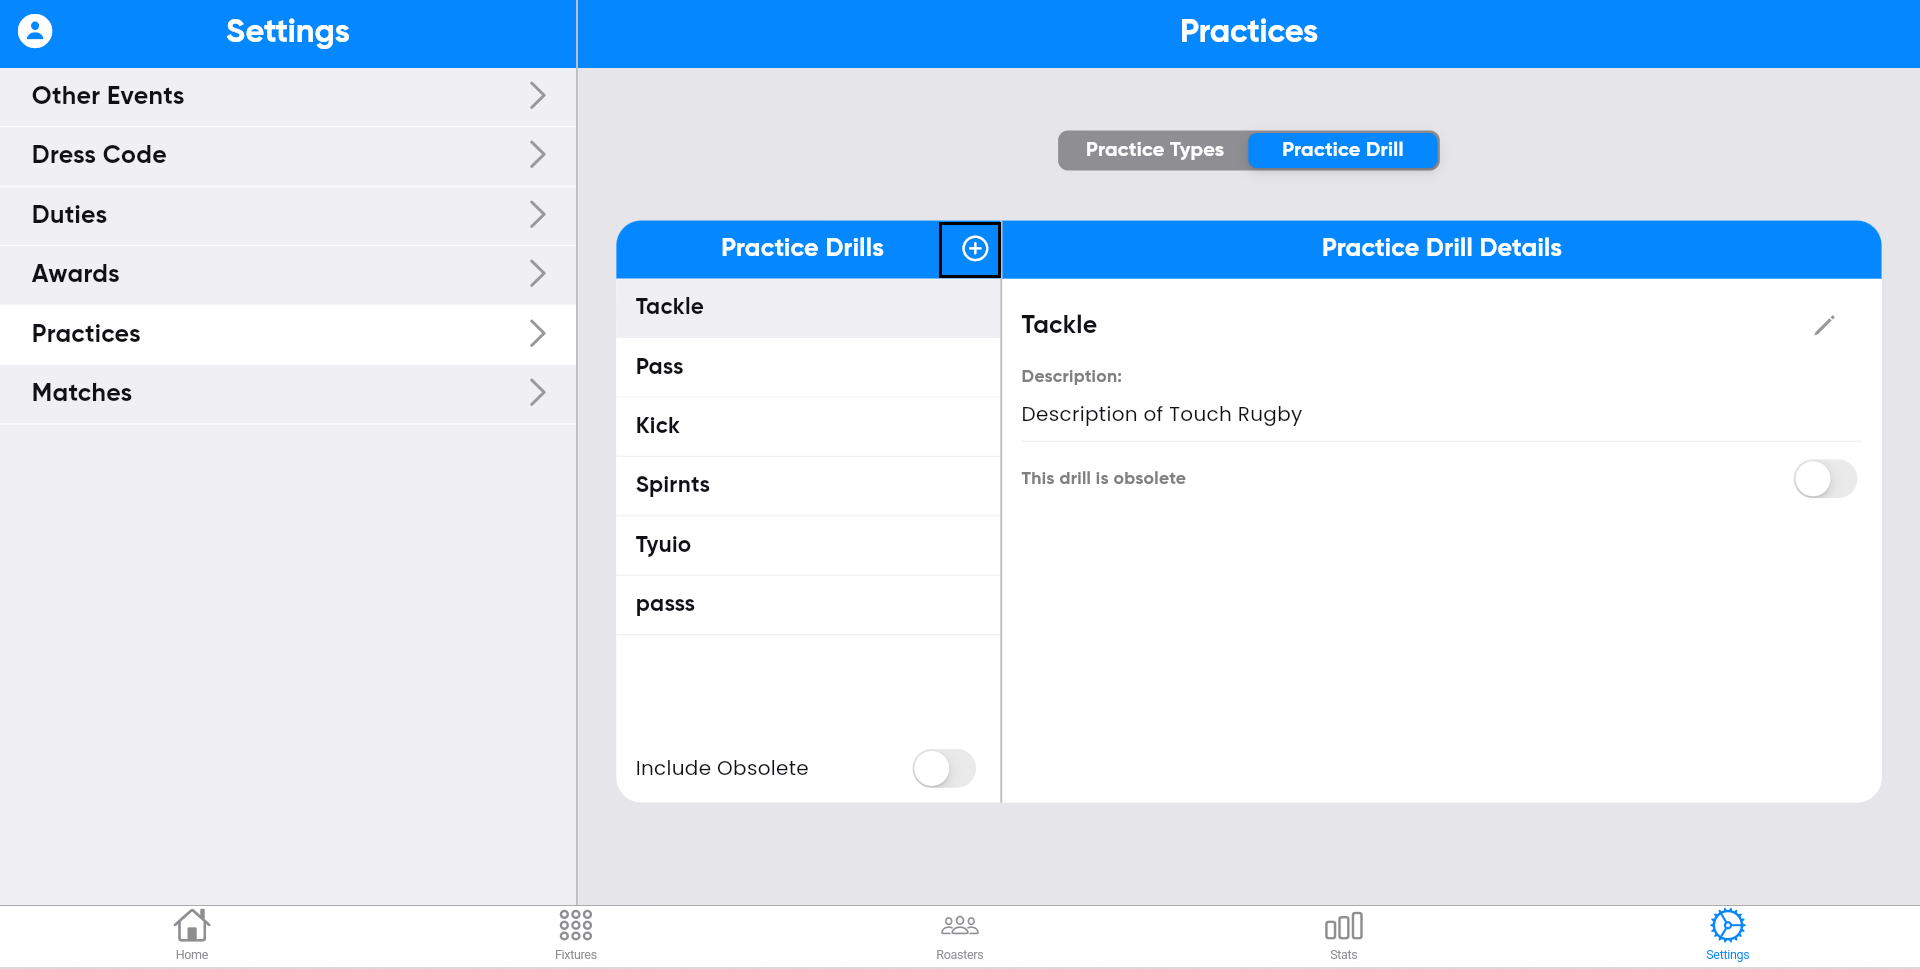
enter the details, and then click save.
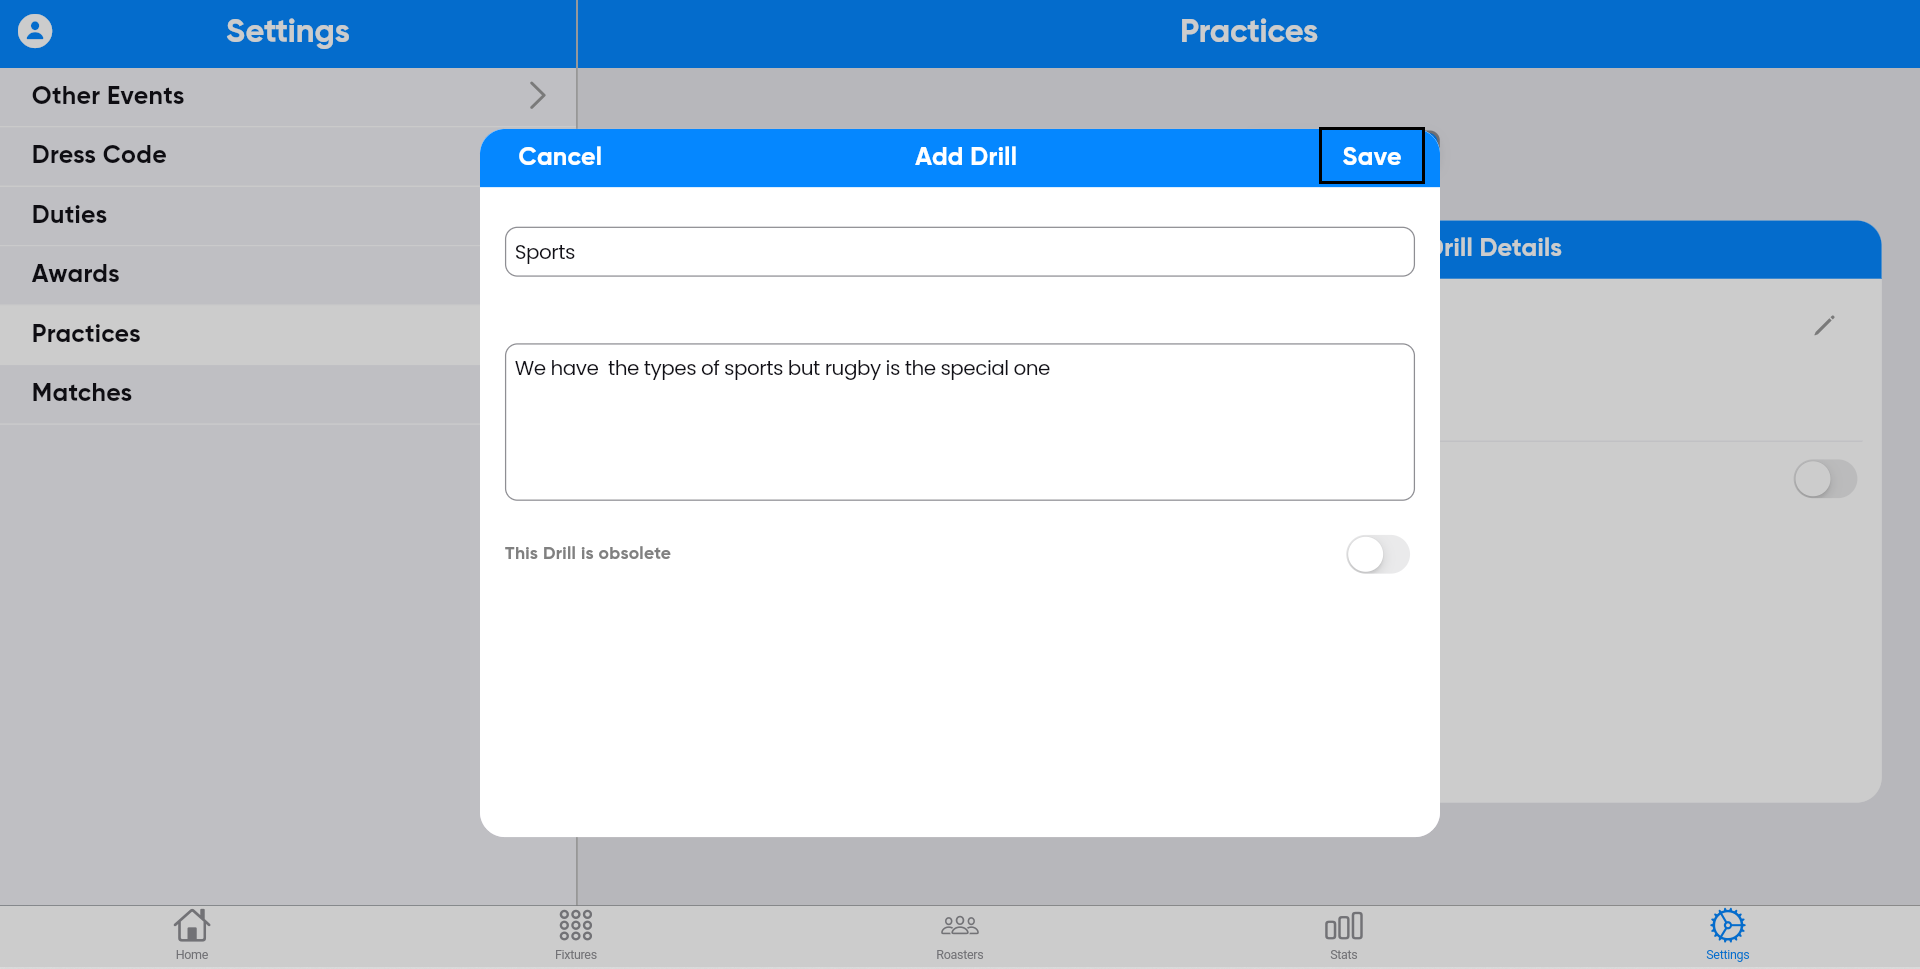
Step-26:
The entered Practice drill information will be
displayed on the screen.

Step-27:
You can edit Practice drill by clicking the edit
symbol on the right side of the screen.

Updating the information, and then clicking save.

The updated information will be displayed on the screen.

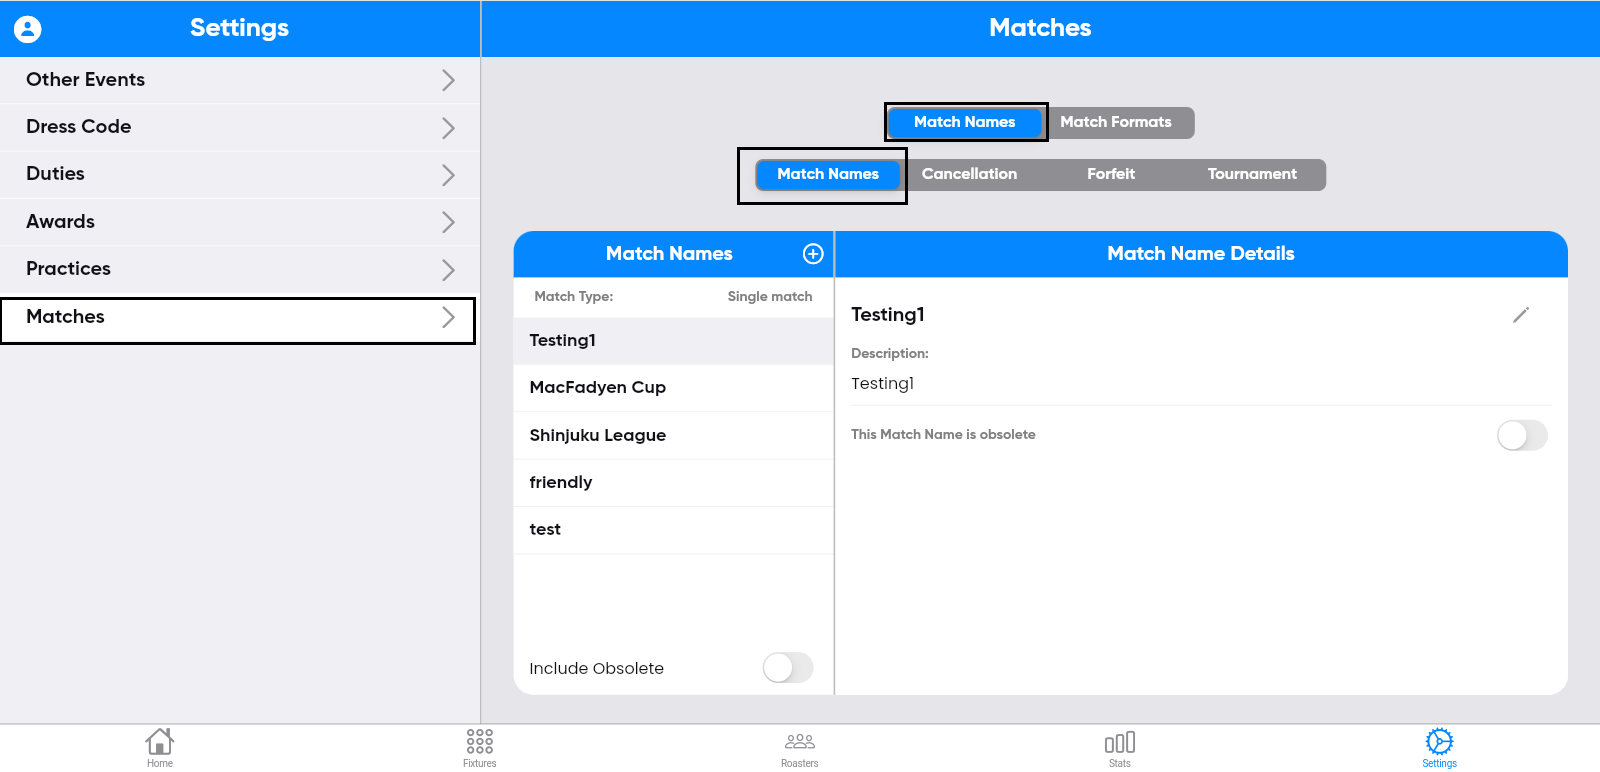
Step-28:
To create Matches, select the "Match Names" button
on the left side of the screen.
Step-29:
After completing step 28, click the "+" symbol on
the screen.

Enter the details, and then click save.


Step-30:
The entered Match names information will be
displayed on the screen.

Step-31:
You can edit Match names by clicking the edit
symbol on the right side of the screen.

Updating the information, and then clicking save.

The updated information will be displayed on the screen.

Step-32:
To create Matches, select the "Cancellation" button
on the left side of the screen.

Step-33:
After completing step 32, click the "+" symbol on
the screen.
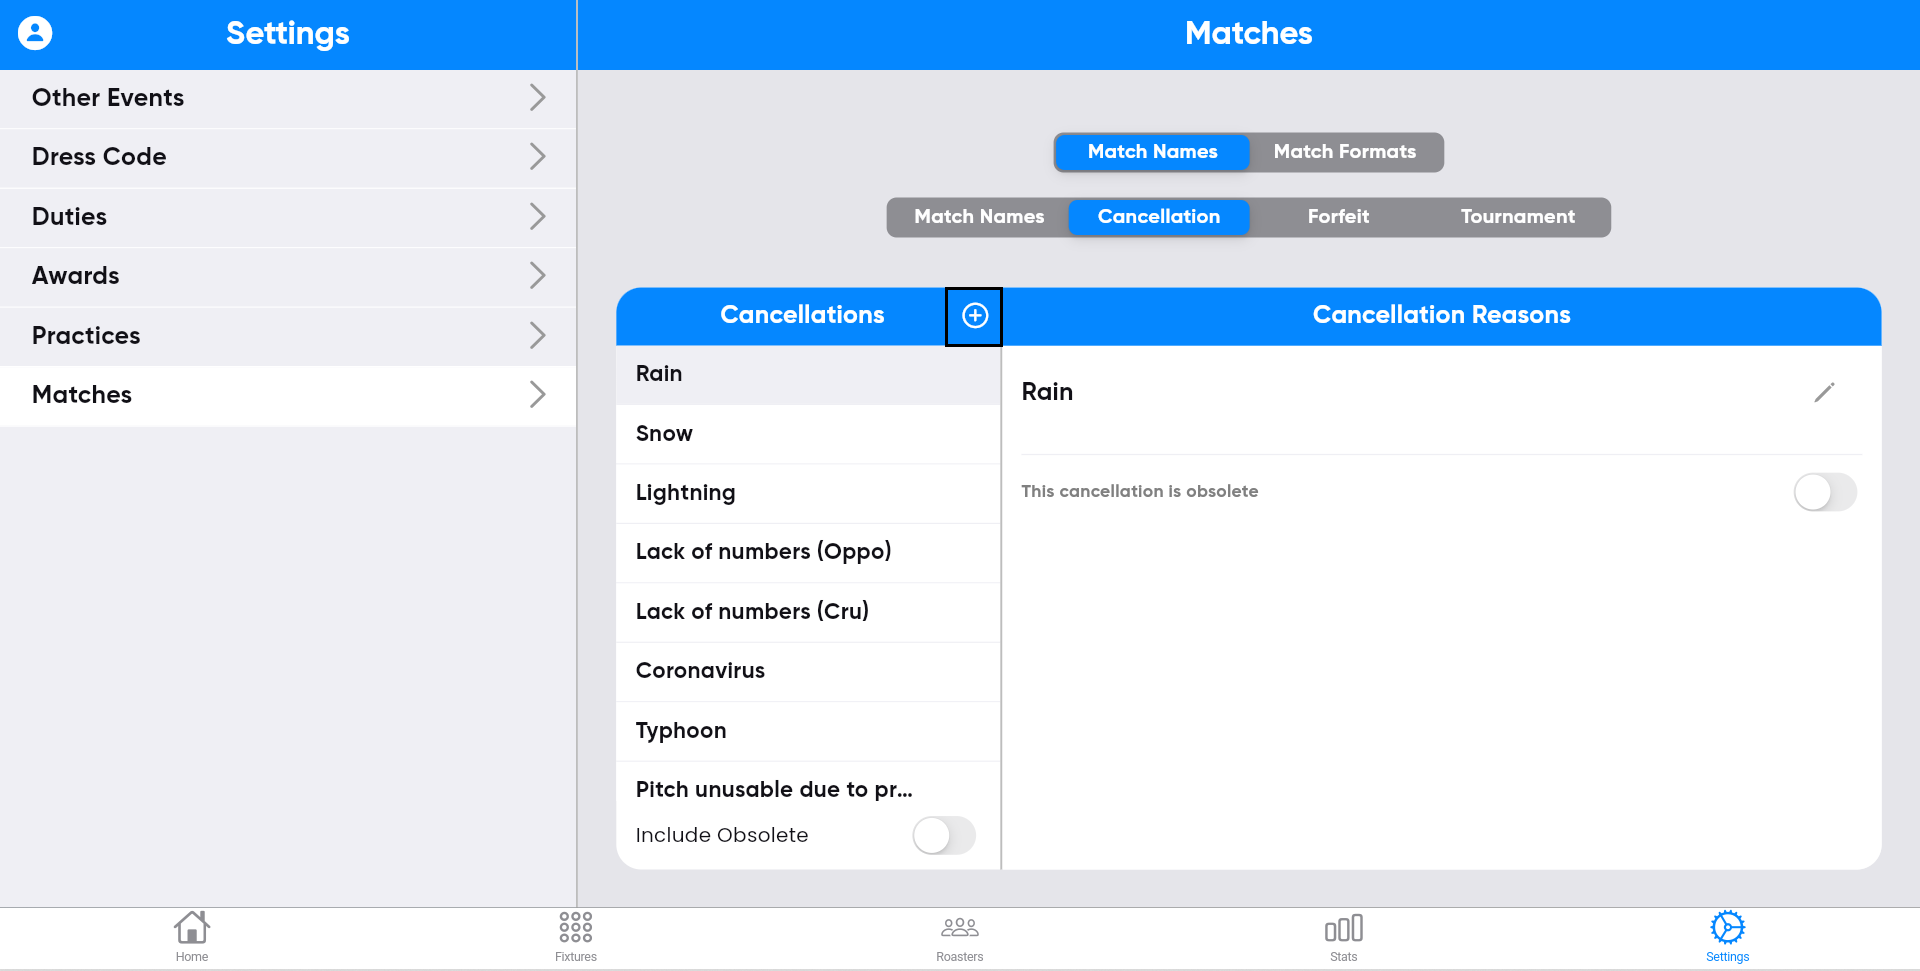
Enter the details, and then click save.

Step-34:
The entered cancellation information will be
displayed on the screen.

Step-35:
You can edit Cancellation by clicking the edit
symbol on the right side of the screen,

updating the information, and then clicking save.
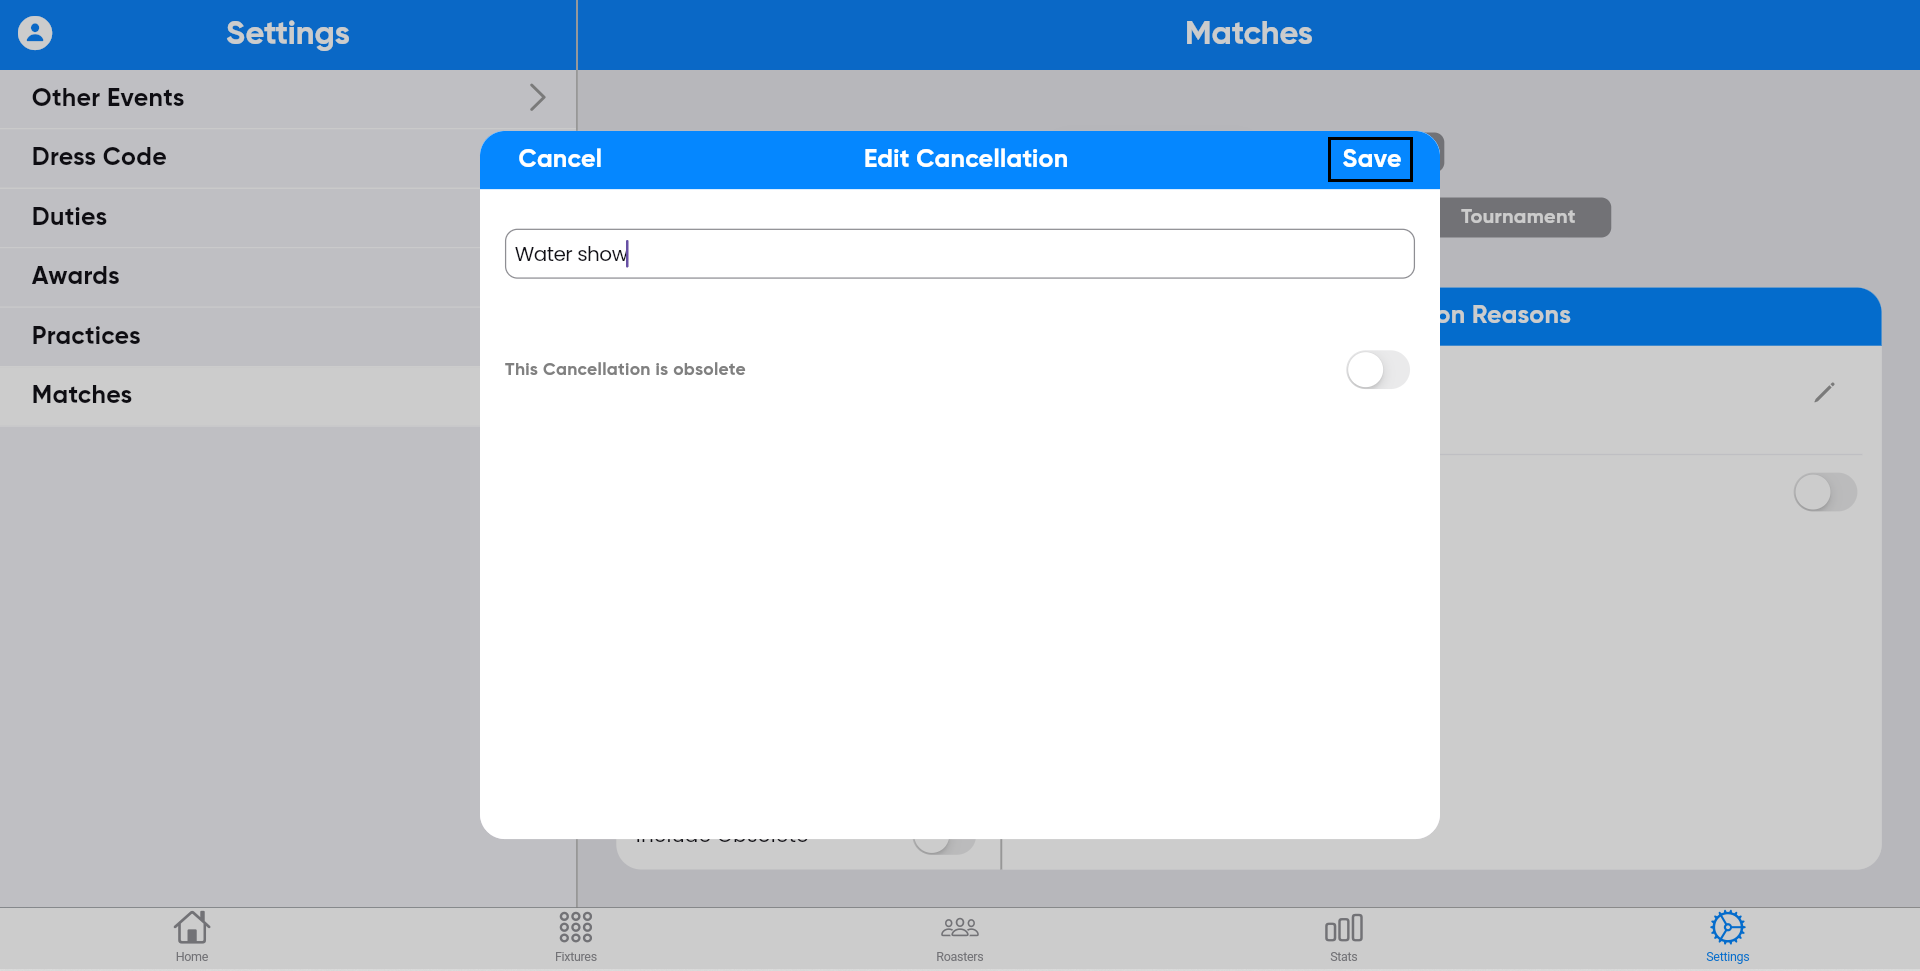
The updated information will be displayed on the screen.

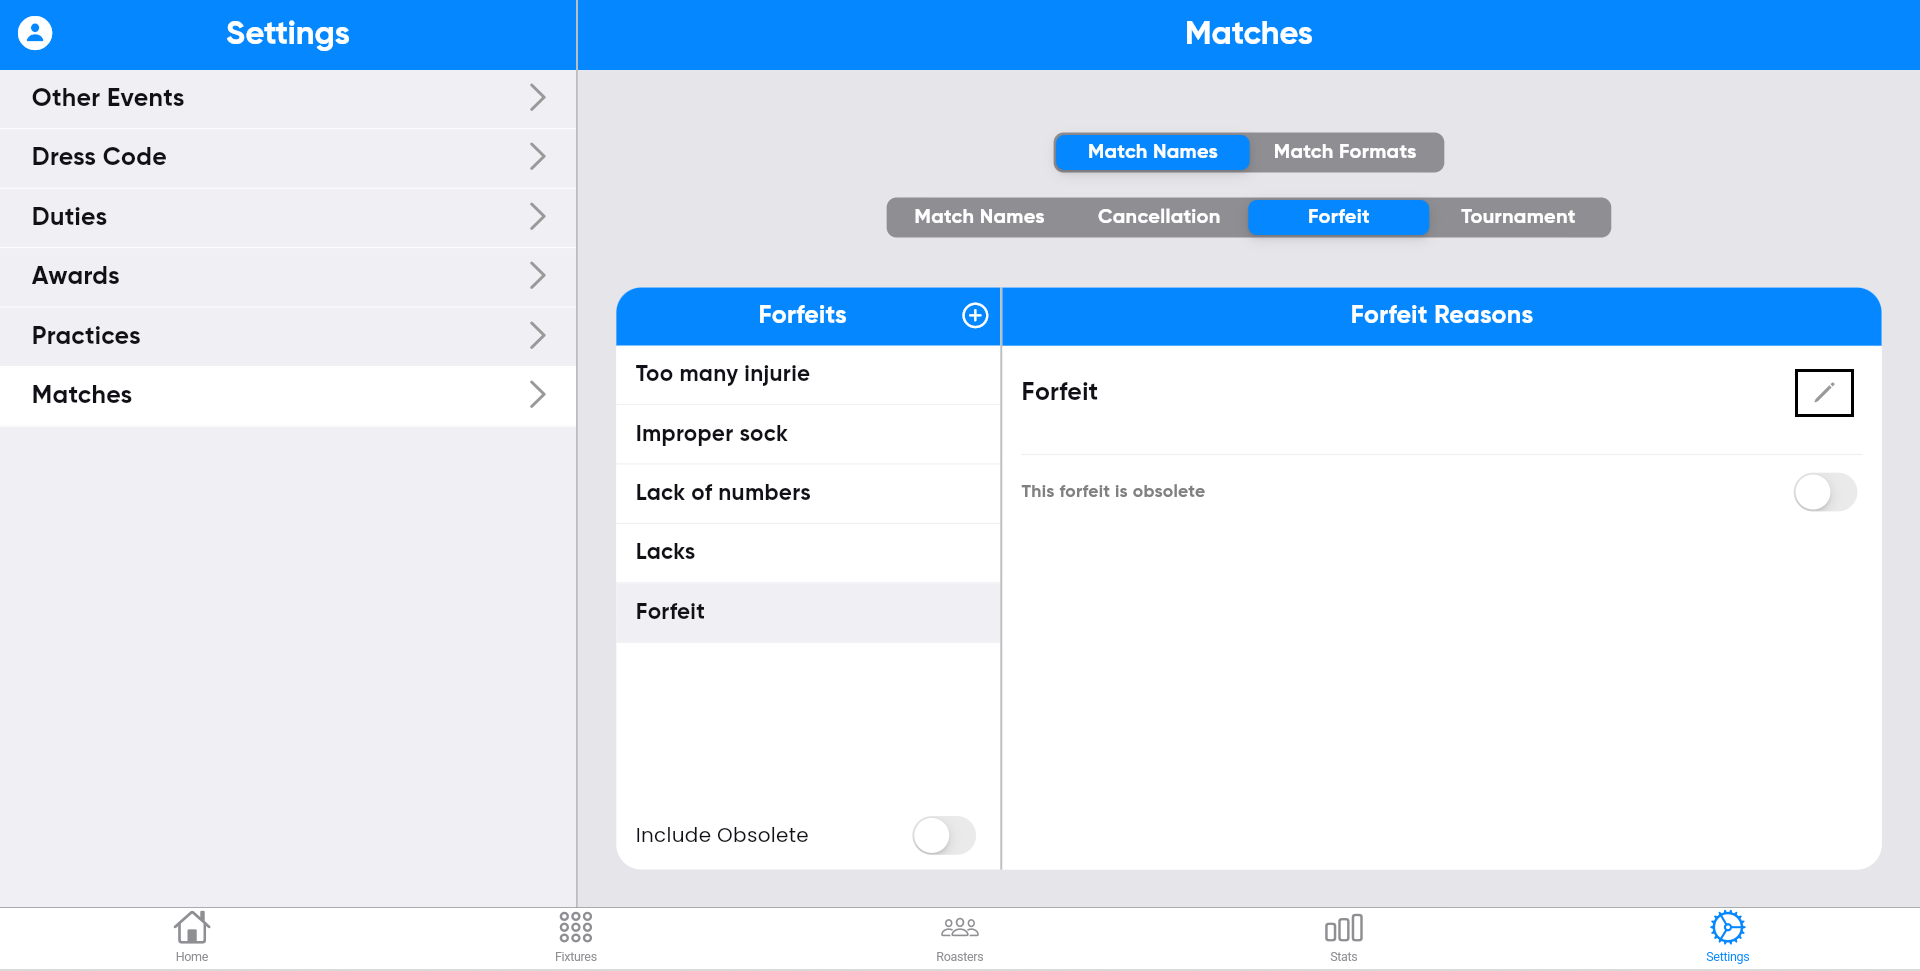
Step-36:
To create Matches, select the "Forfeit" button on
the left side of the screen.
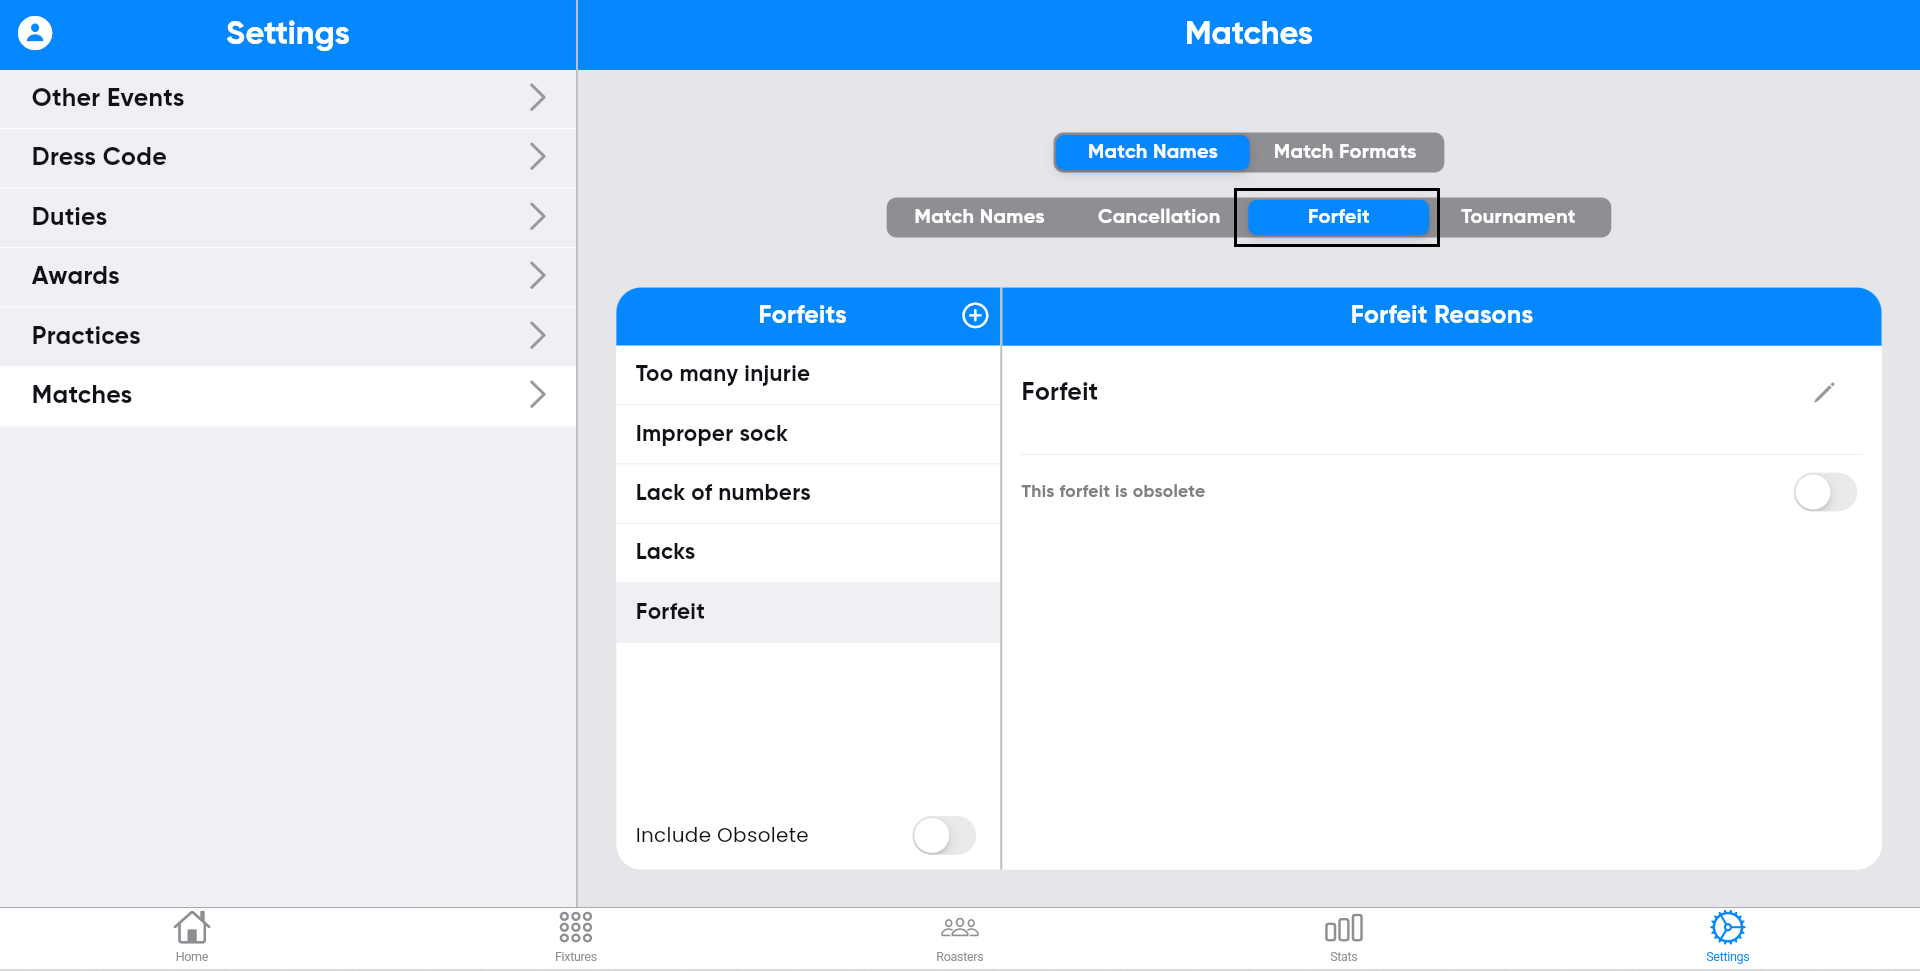
Step-37:
After completing step 36, click the "+" symbol on
the screen.

Enter the details, and then click save.

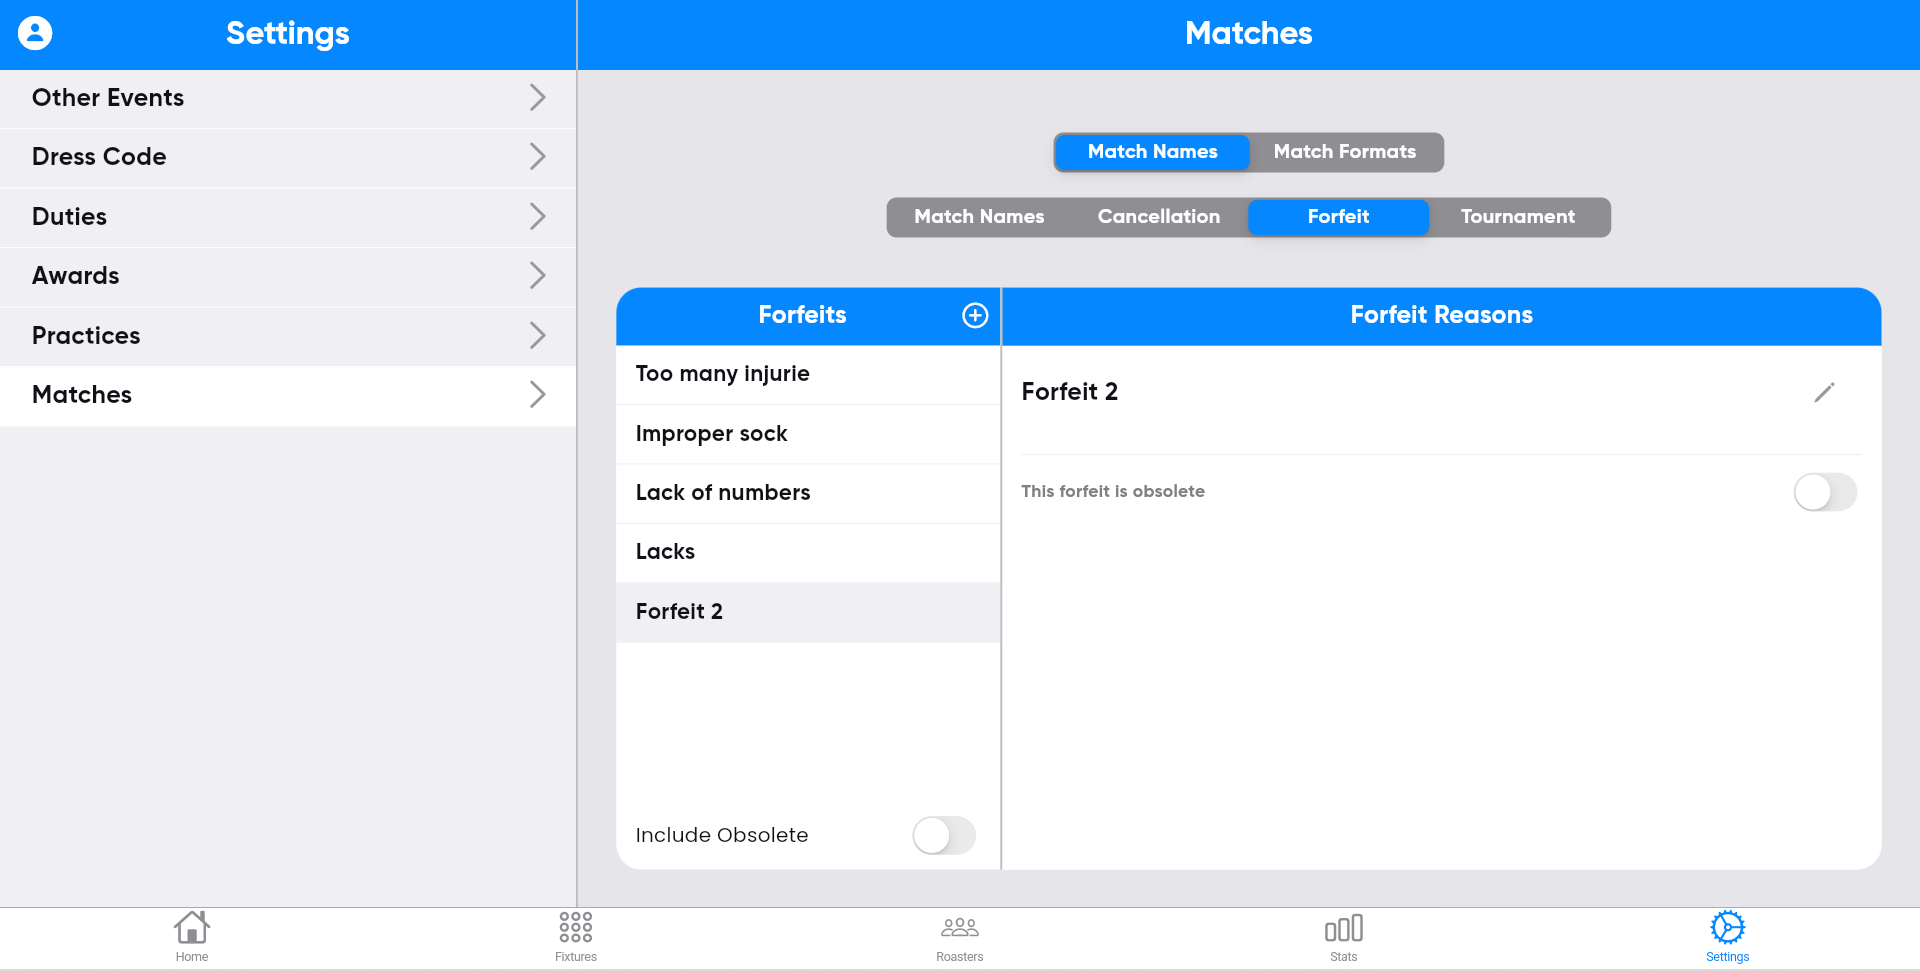
Step-38:
The entered Forfeit information will be displayed
on the screen.

Step-39:
You can edit Forfeit by clicking the edit symbol on
the right side of the screen
updating the information, and then clicking save.

The updated information will be displayed on the screen.
Step-40:
To create Matches, select the "Tournament" button
on the left side of the screen.

Step-41:
After completing step 40, click the "+" symbol on
the screen.

Enter the details, and then click save.

Step-42:
The entered Tournament information will be
displayed on the screen.

Step-43:
You can edit Tournament by clicking the edit symbol
on the right side of the screen

updating the information, and then clicking save.

Step-44:
To create Matches, select the "Match formats"
button on the left side of the screen.

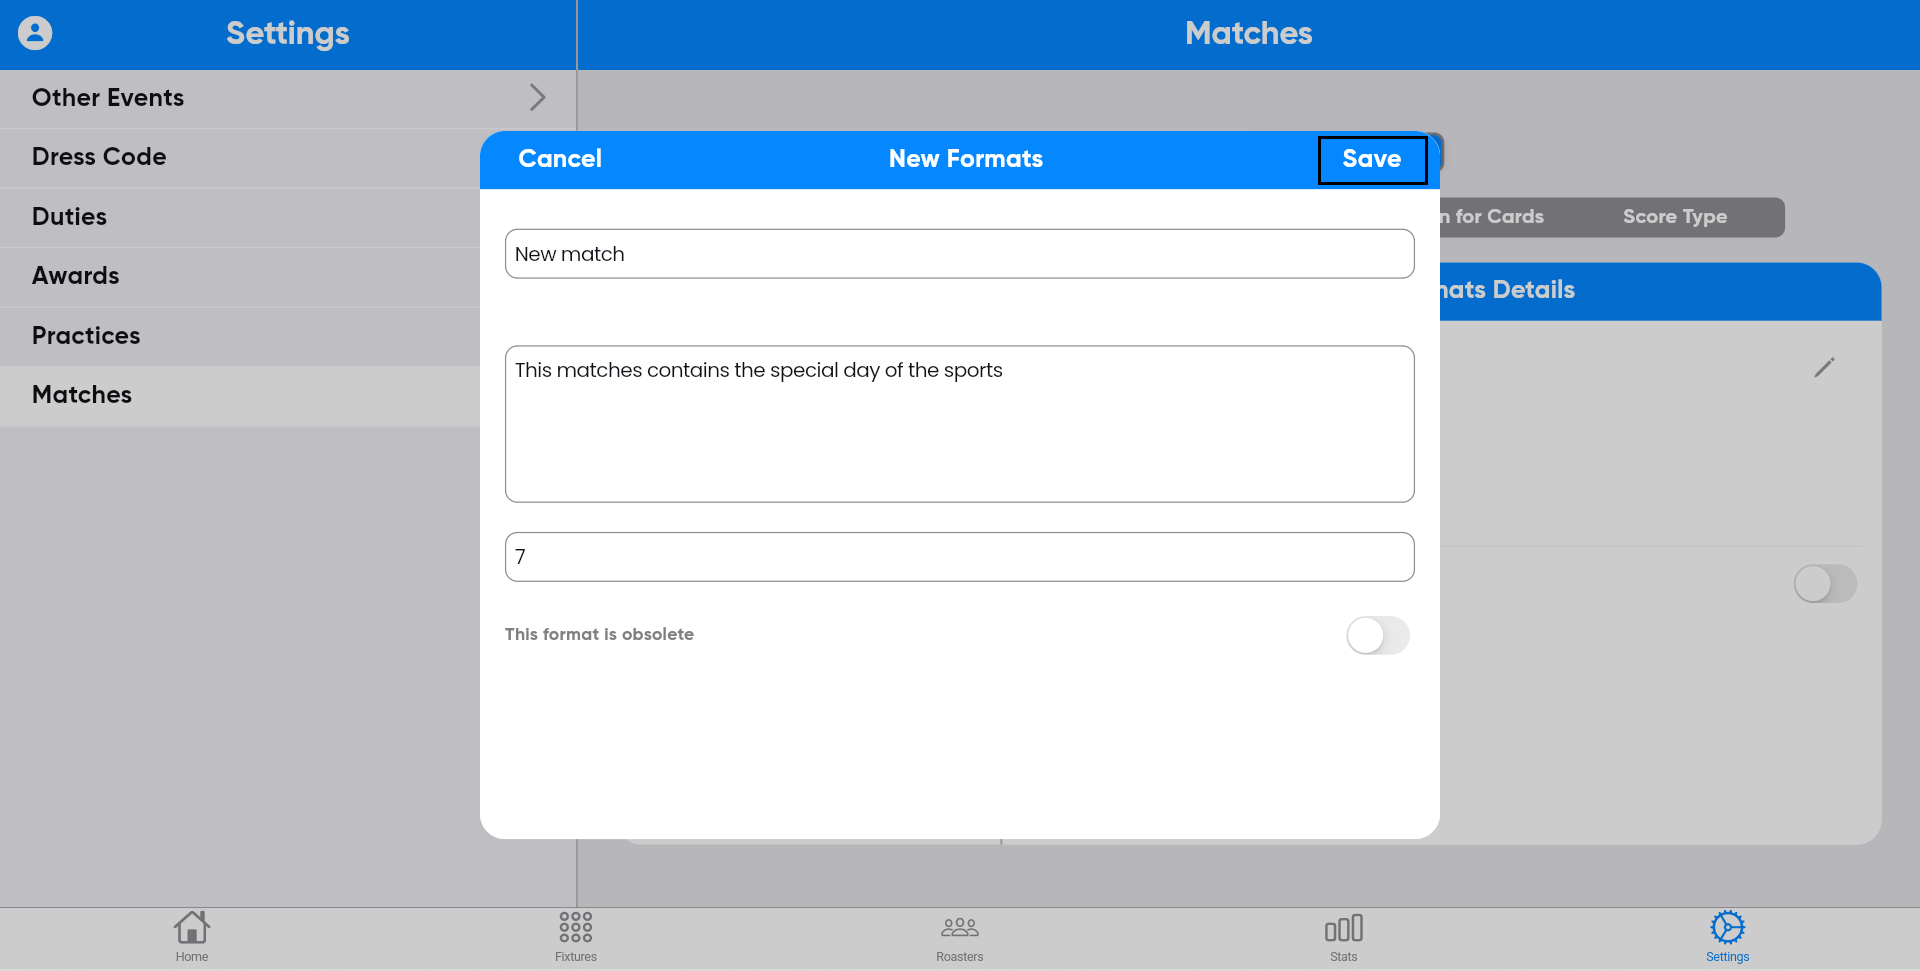
Step-45:
After completing step 44, click the "+" symbol on
the screen.

Enter the details, and then click save.
Step-46:
The entered Match format information will be
displayed on the screen.

Step-47:
You can edit Match format by clicking the edit
symbol on the right side of the screen.
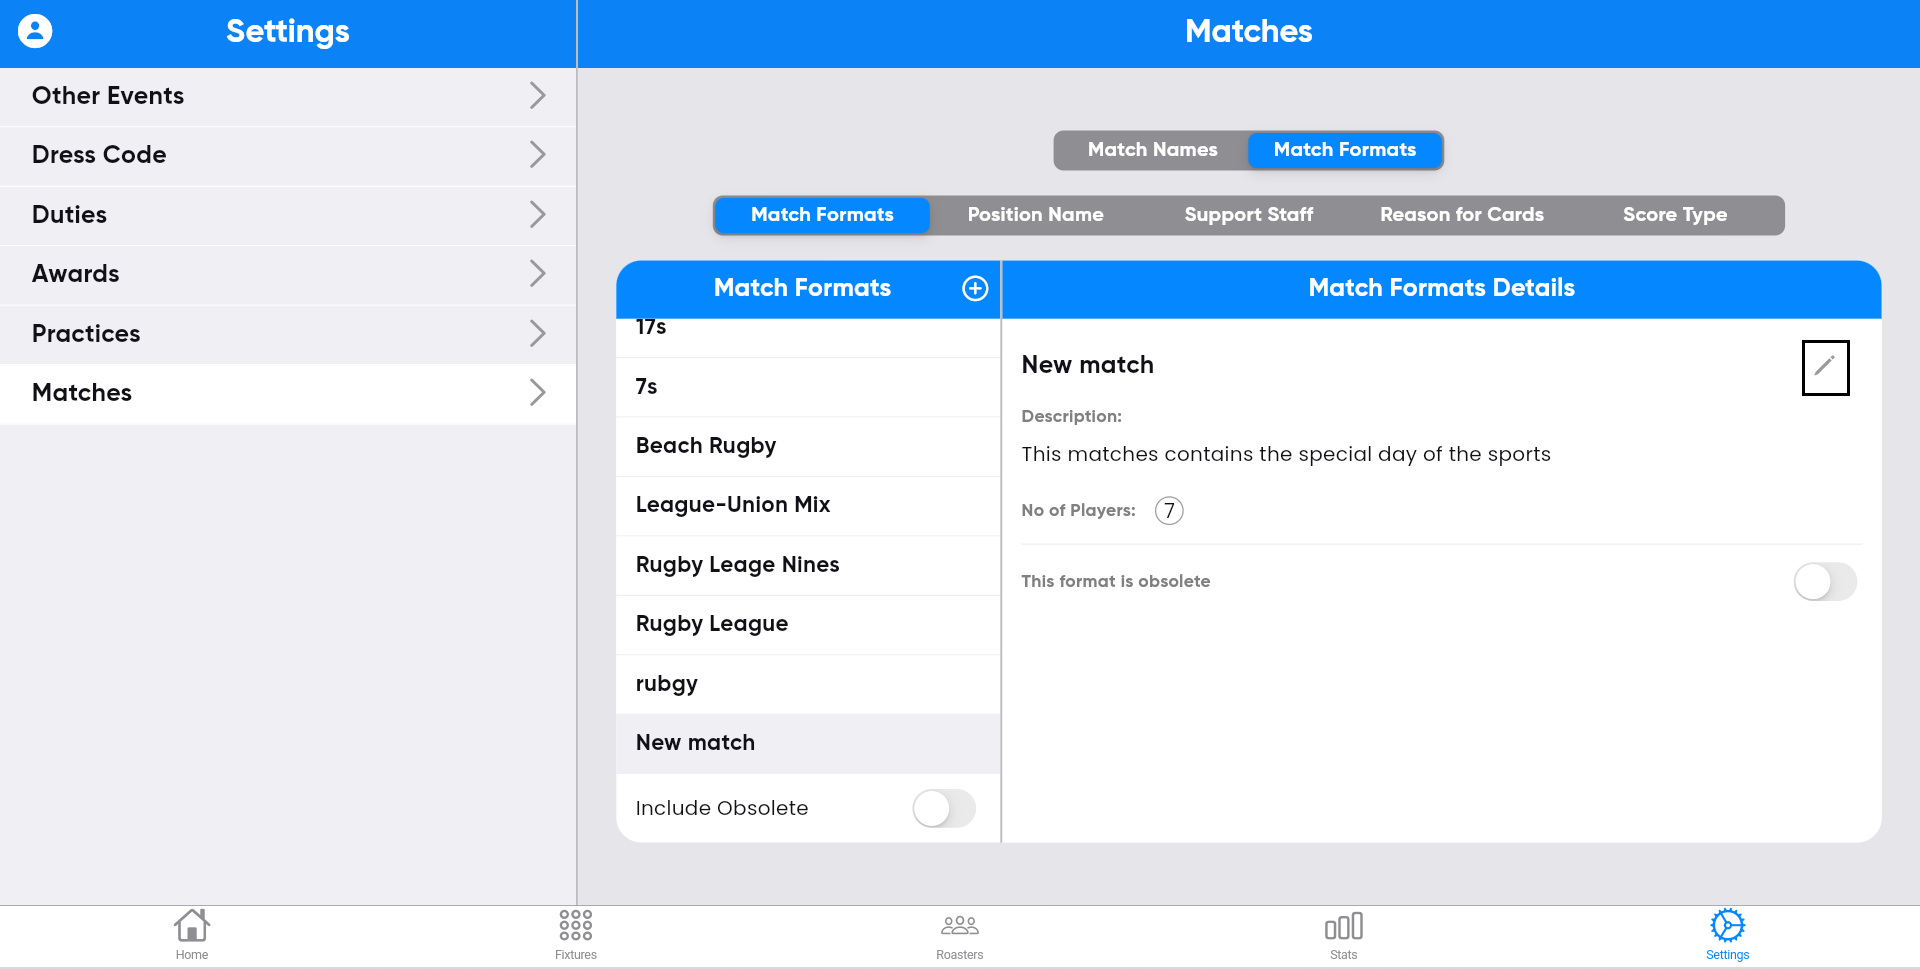
Updating the information, and then clicking save.

The updated information will be displayed on the screen.

Step-48:
To create Matches, select the "Position Name"
button on the right side of the screen.

Step-49:
After completing step 48, click the "+" symbol on
the screen.
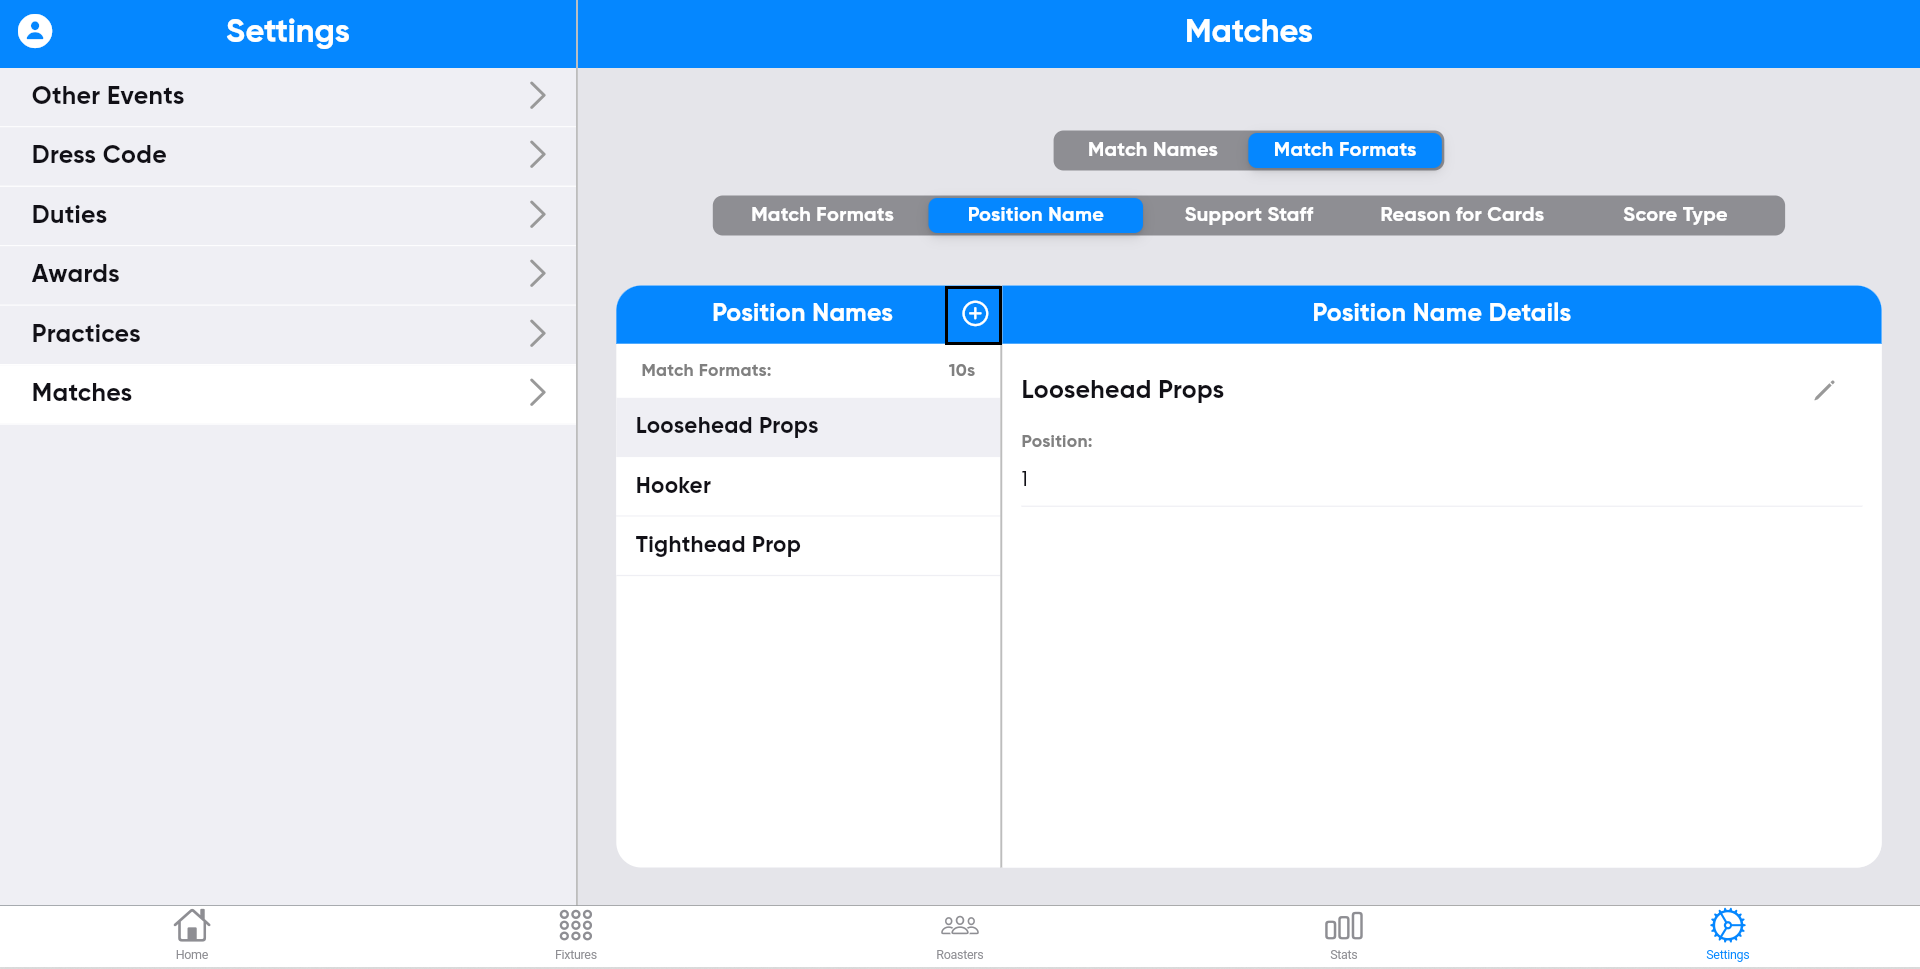
Enter the details, and then click save.


Step-50:
The entered Position Name information will be
displayed on the screen.

Step-51:
You can edit Position Name by clicking the edit
symbol on the right side of the screen.

Updating the information, and then clicking save.

The updated information will be displayed on the screen.

Step-52:
To create Matches, select the "Support staff"
button on the left side of the screen.

Step-53:
After completing step 52, click the "+" symbol on
the screen.

Enter the details, and then click save.


Step-54:
The entered Support staff information will be
displayed on the screen.

Step-55:
You can edit Support staff by clicking the edit
symbol on the right side of the screen.

Updating the information, and then clicking save.

The updated information will be displayed on the screen.

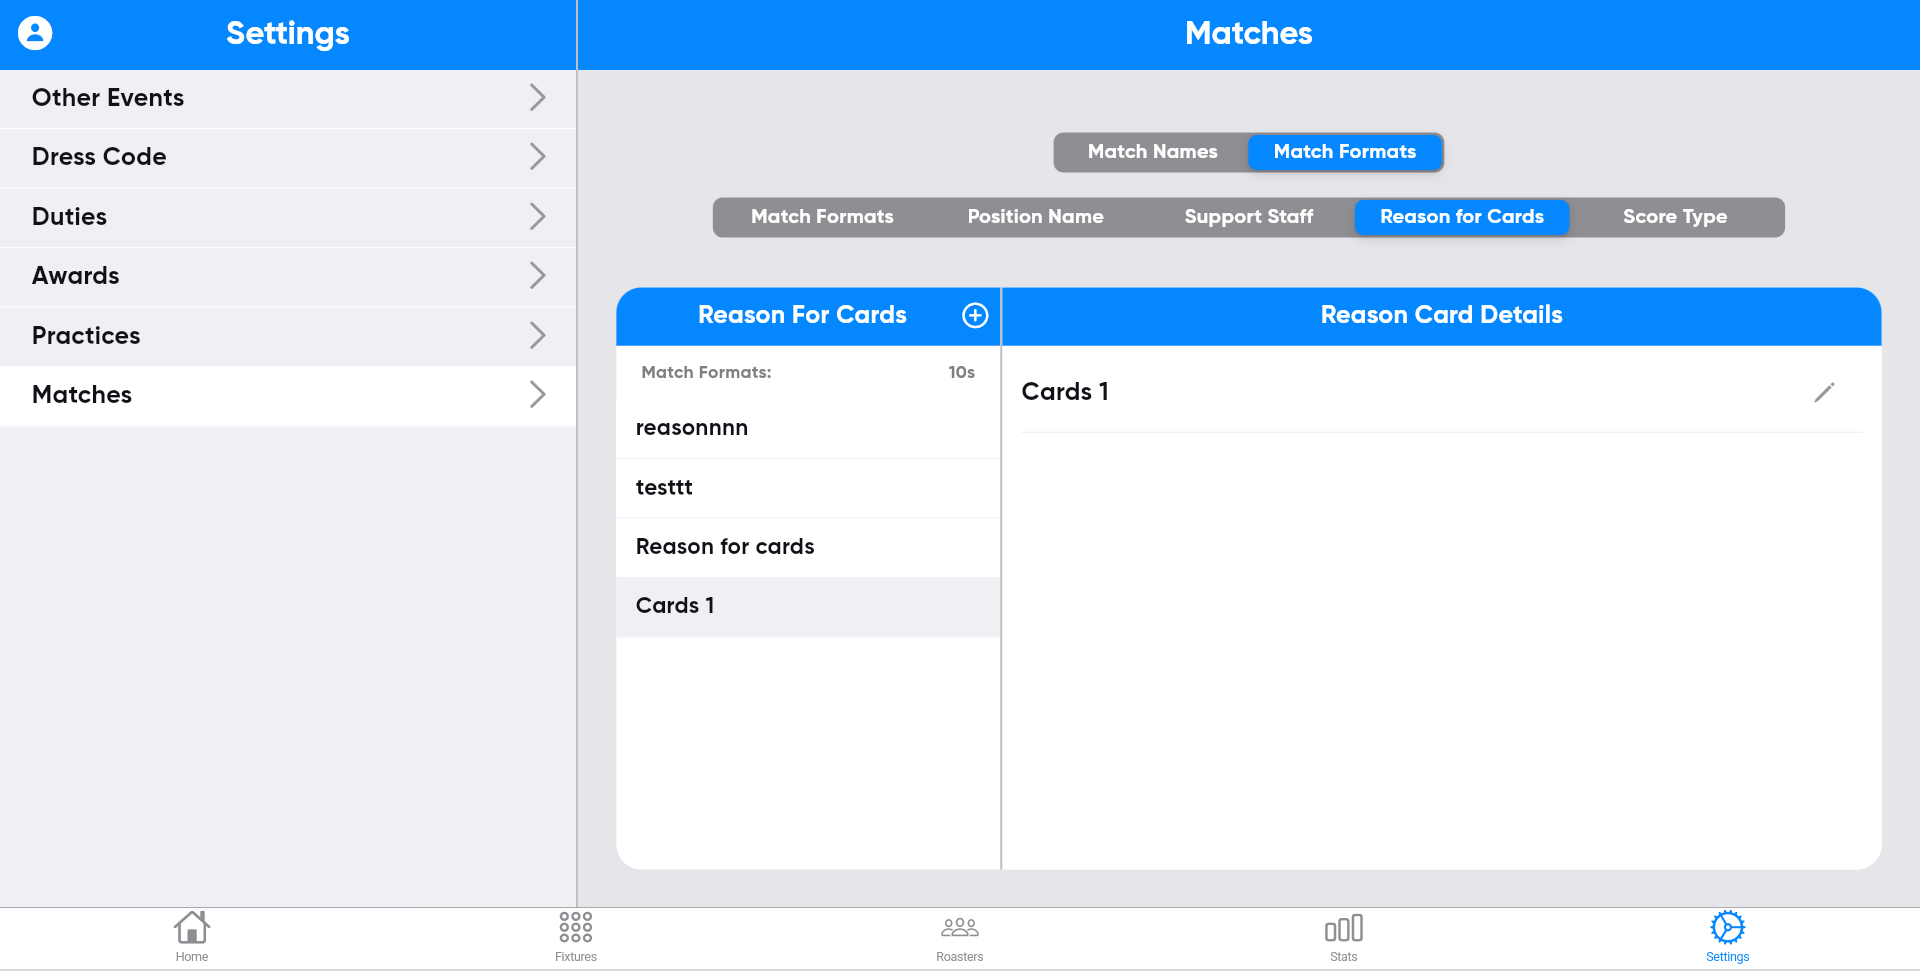
Step-56:
To create Matches, select the "Reason for cards"
button on the right side of the screen.

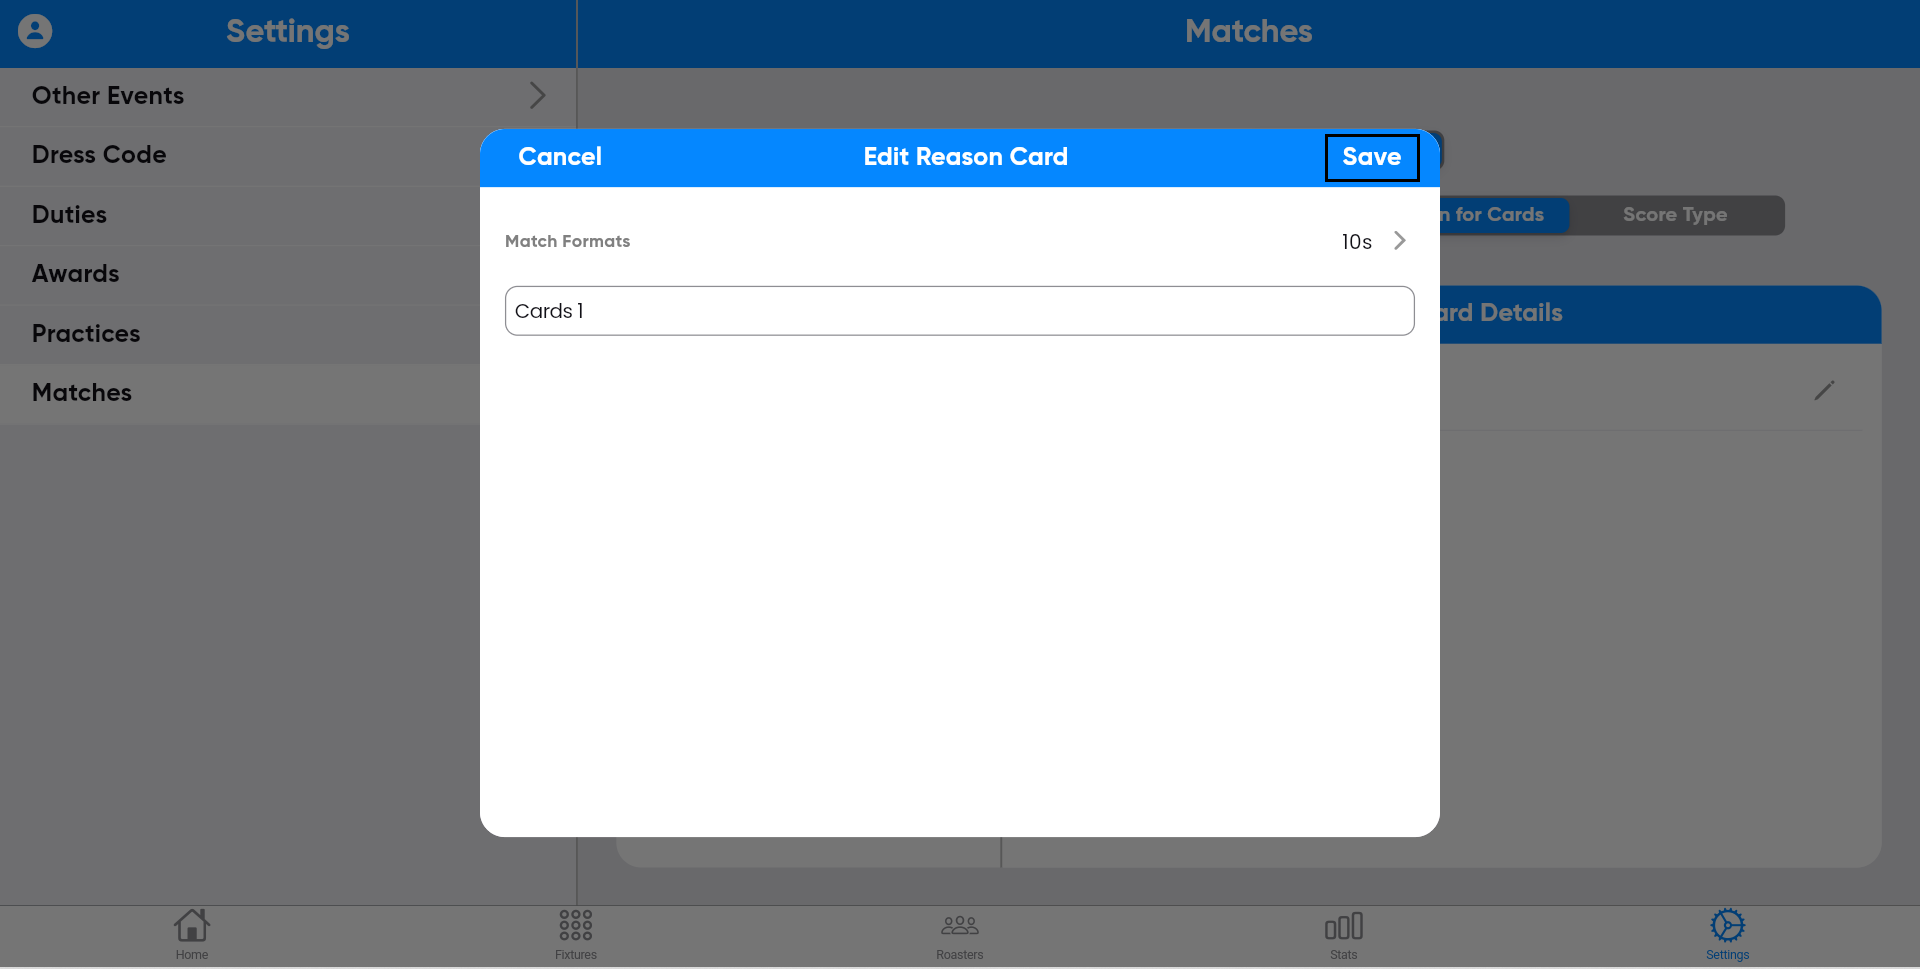
Step-57:
After completing step 56, click the "+" symbol on
the screen.

Enter the details, and then click save.


Step-58:
The entered Reason for cards information will be
displayed on the screen.

Step-59:
You can edit Reason for cards by clicking the edit
symbol on the right side of the screen.

Updating the information, and then clicking save.
The updated information will be displayed on the screen.
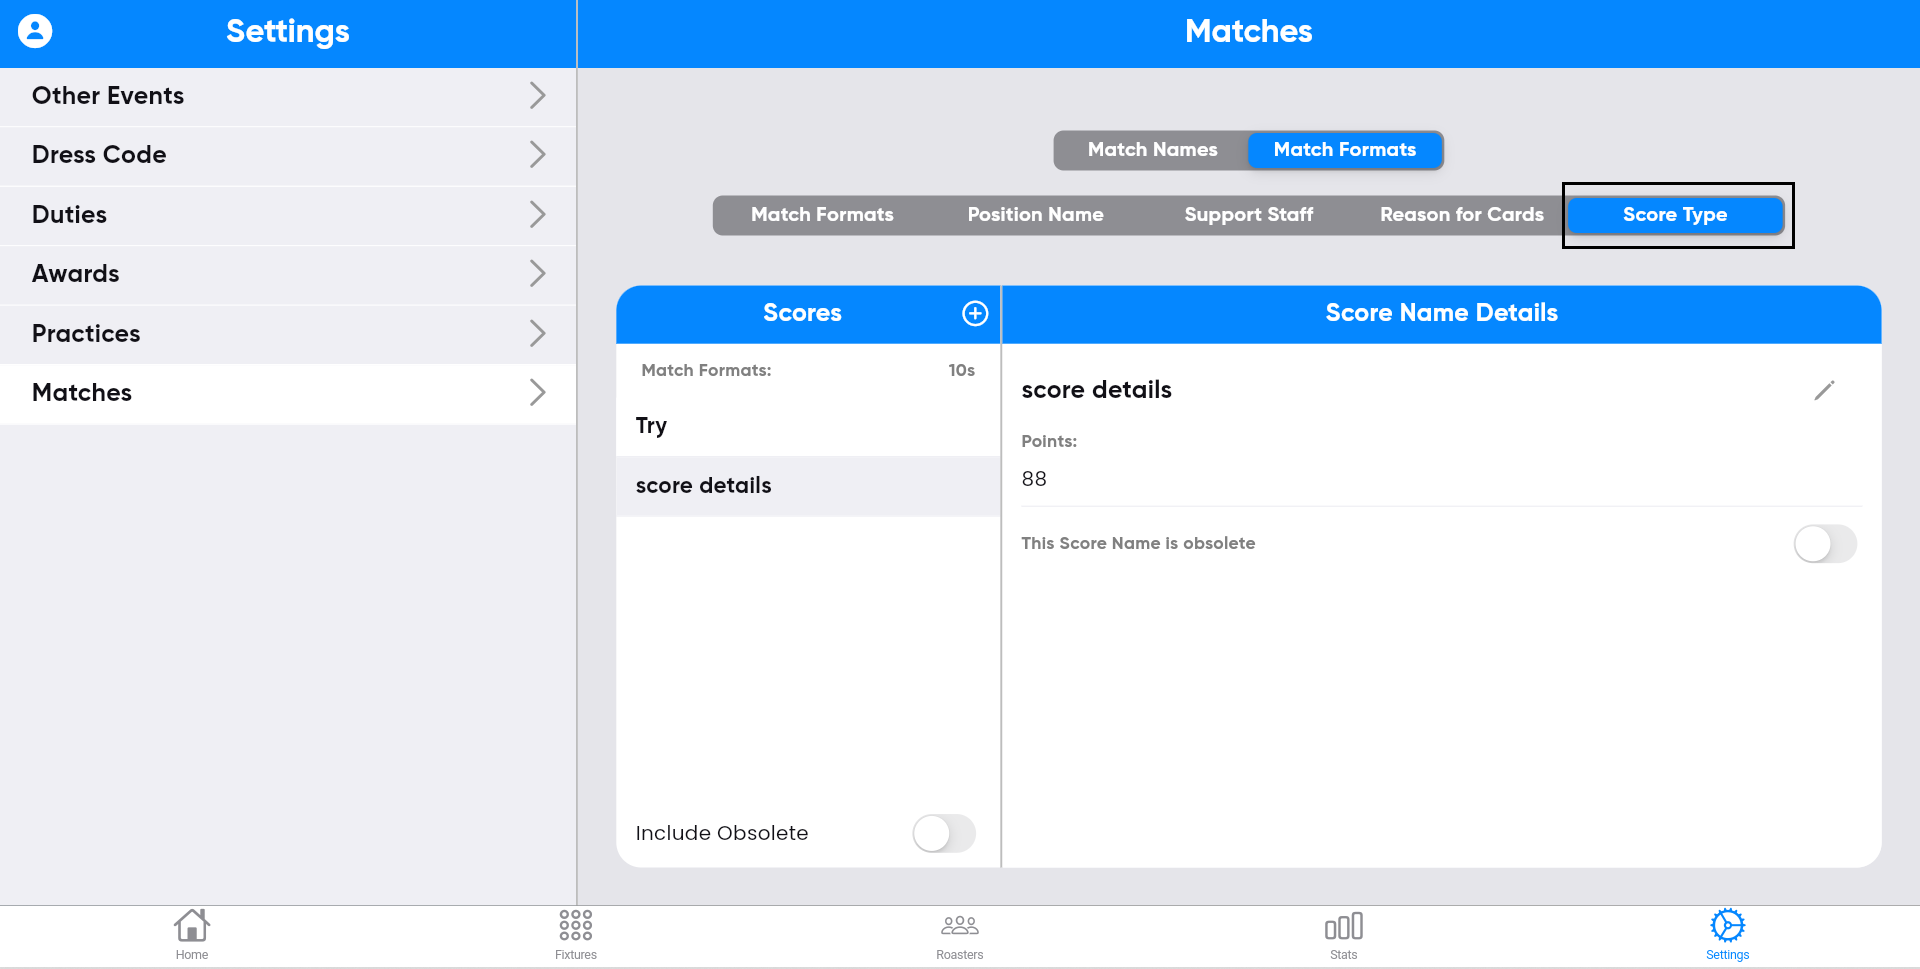
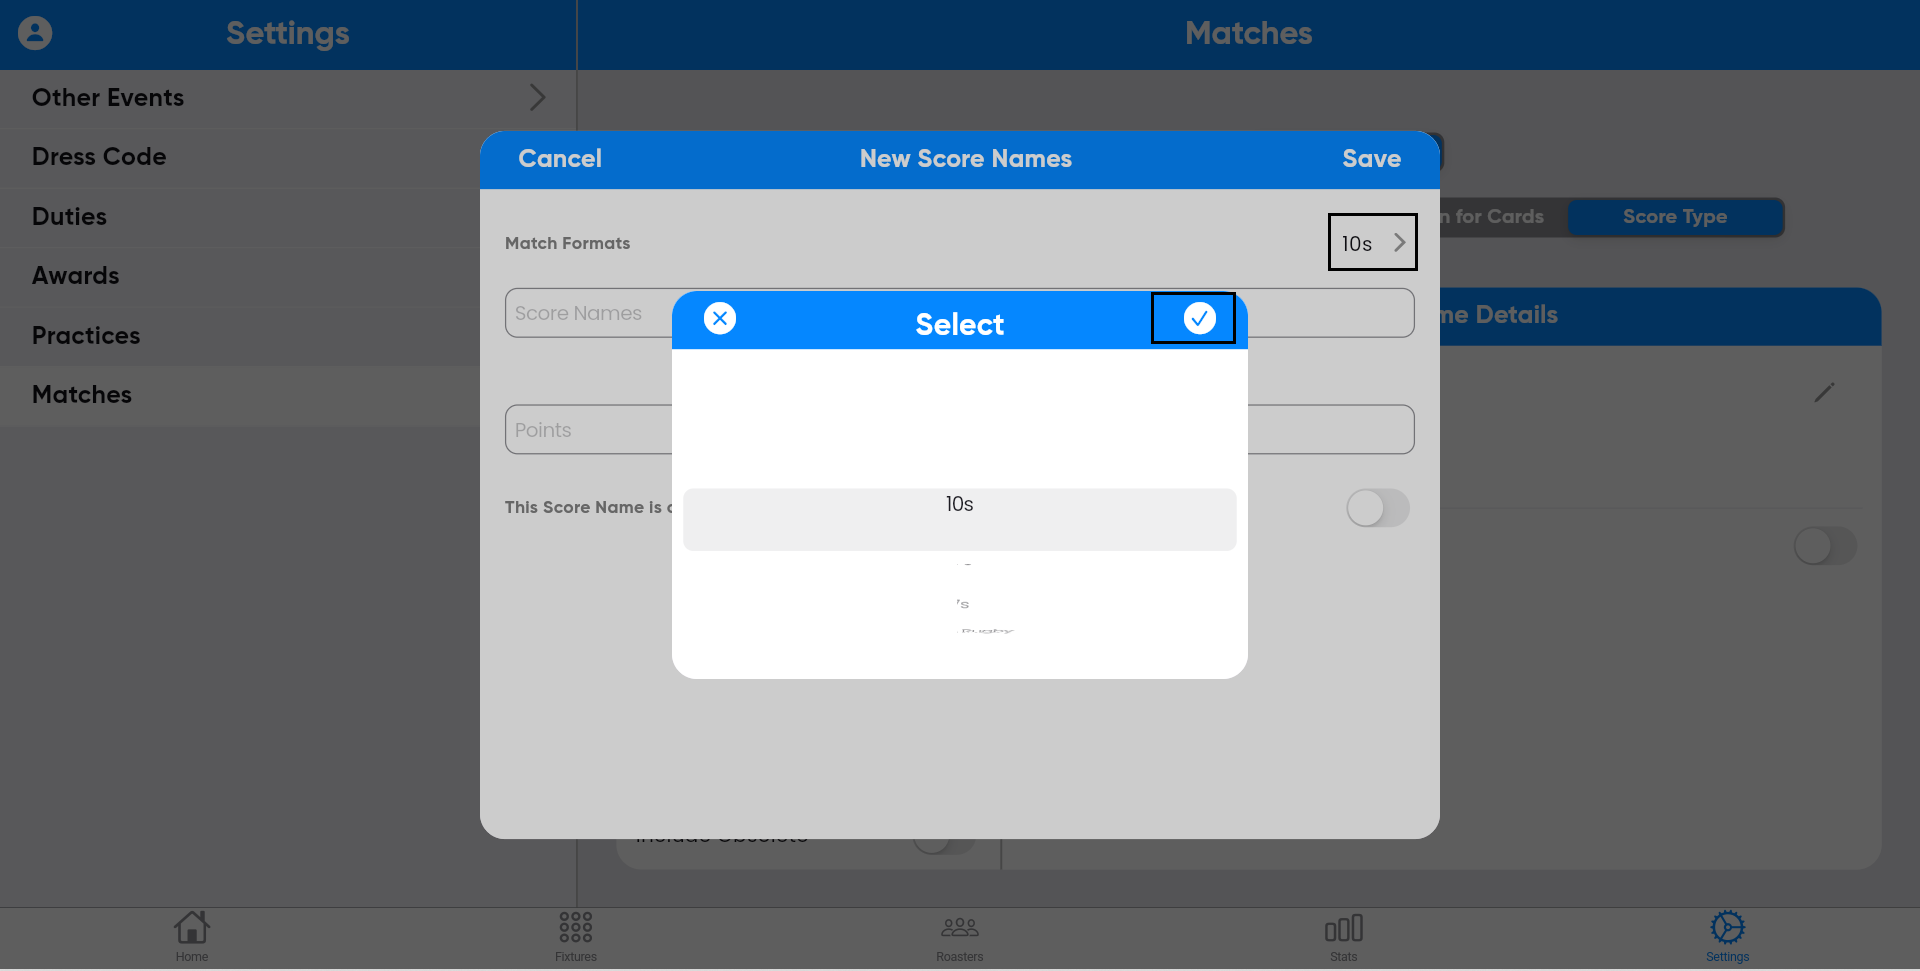
Step-60:
To create Matches, select the "Score type" button
on the right side of the screen.
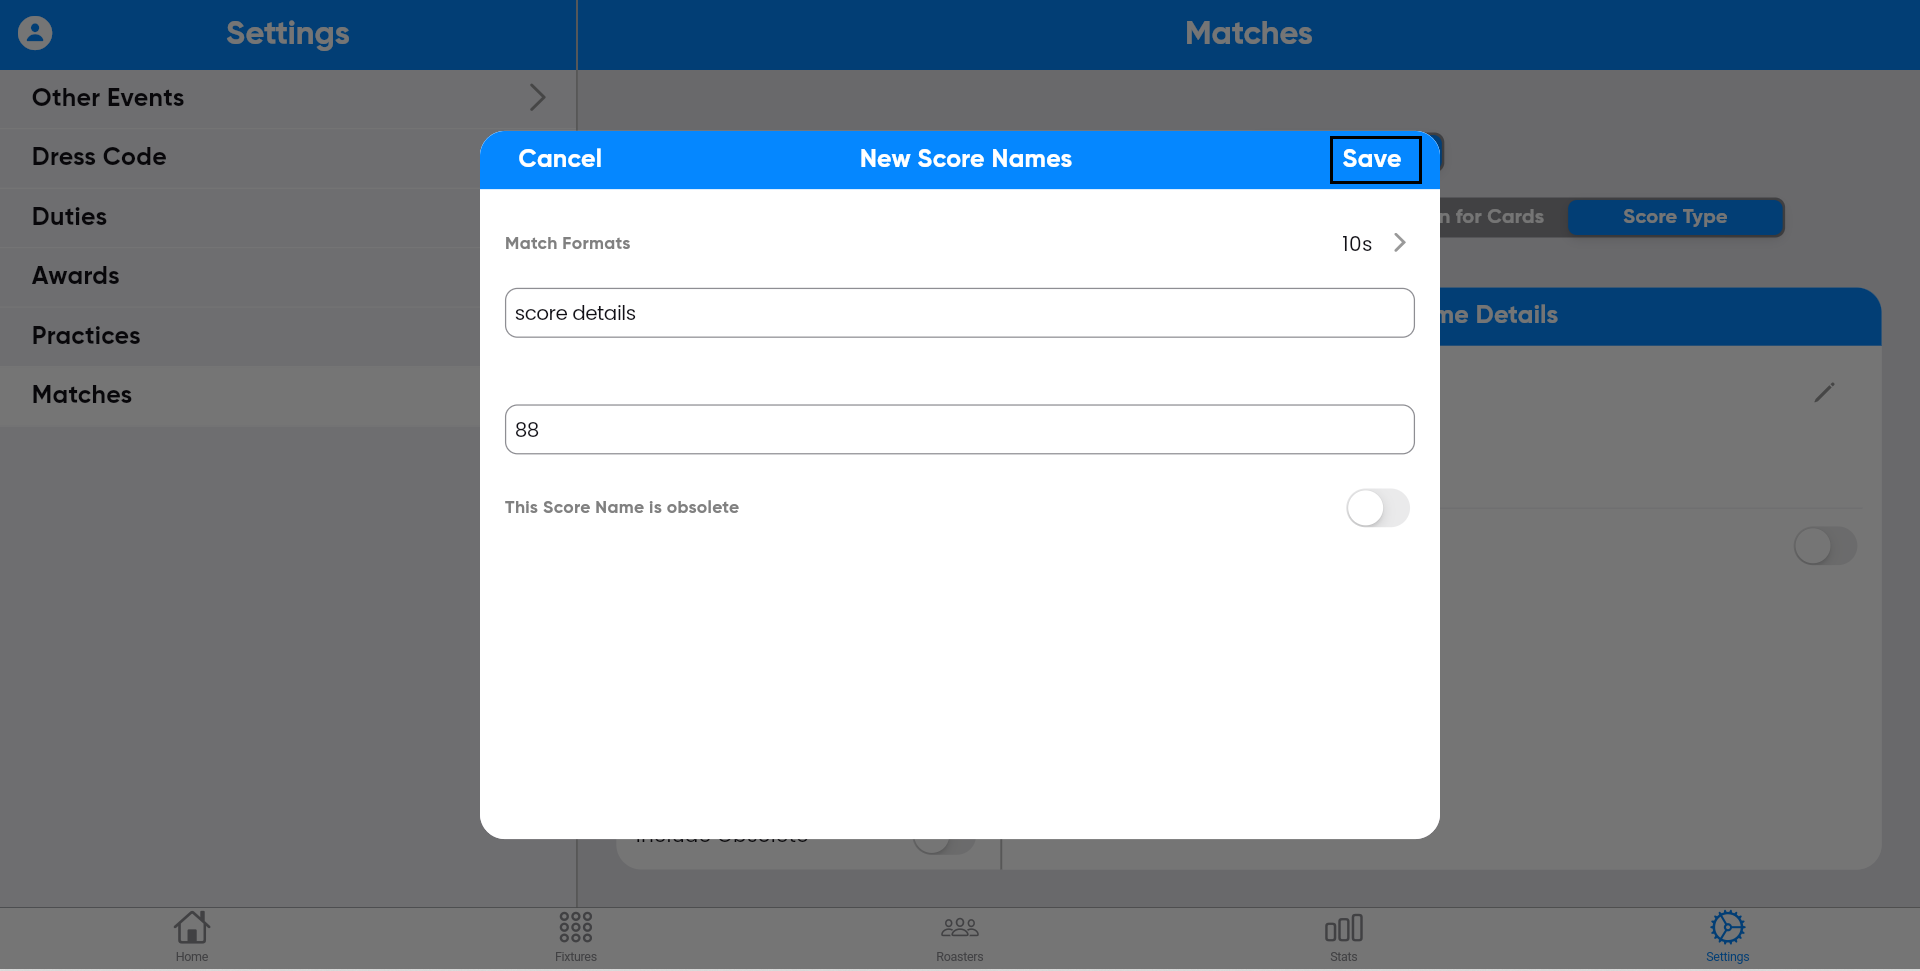
Step-61:
After completing step 60, click the "+" symbol on
the screen.

Enter the details, and then click save.
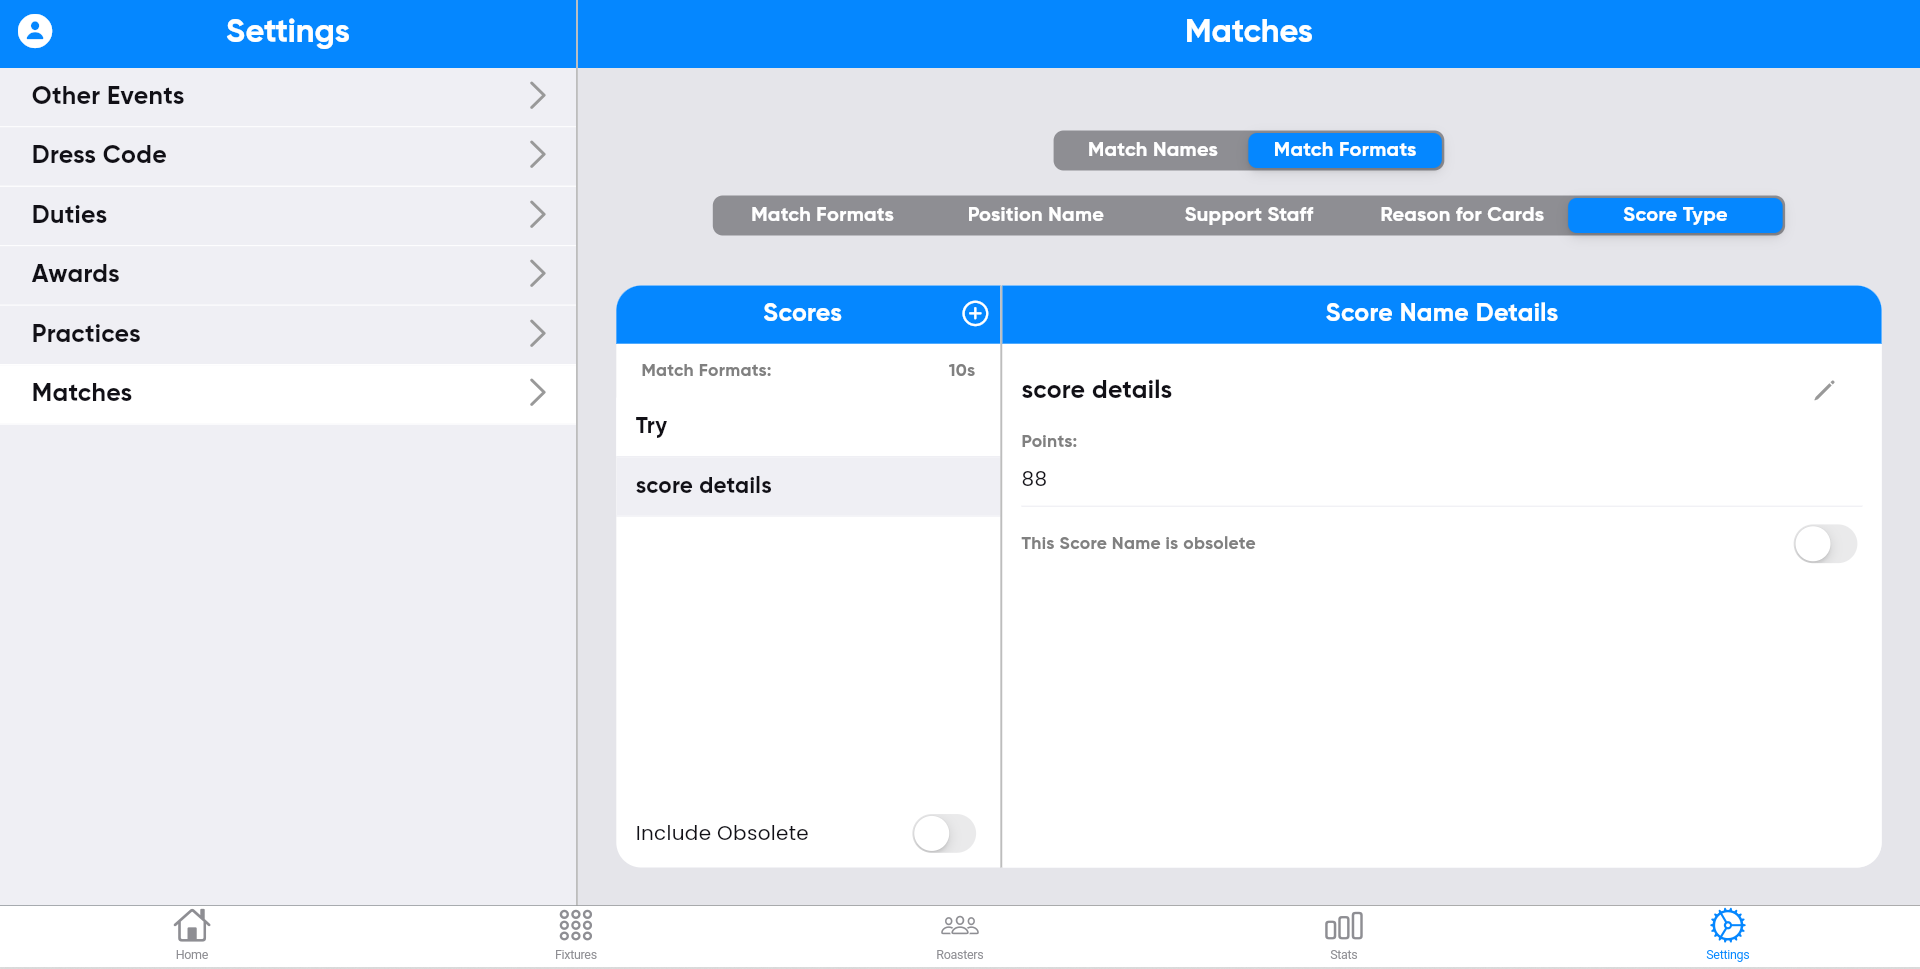
Step-62:
The entered Score type information will be
displayed on the screen.
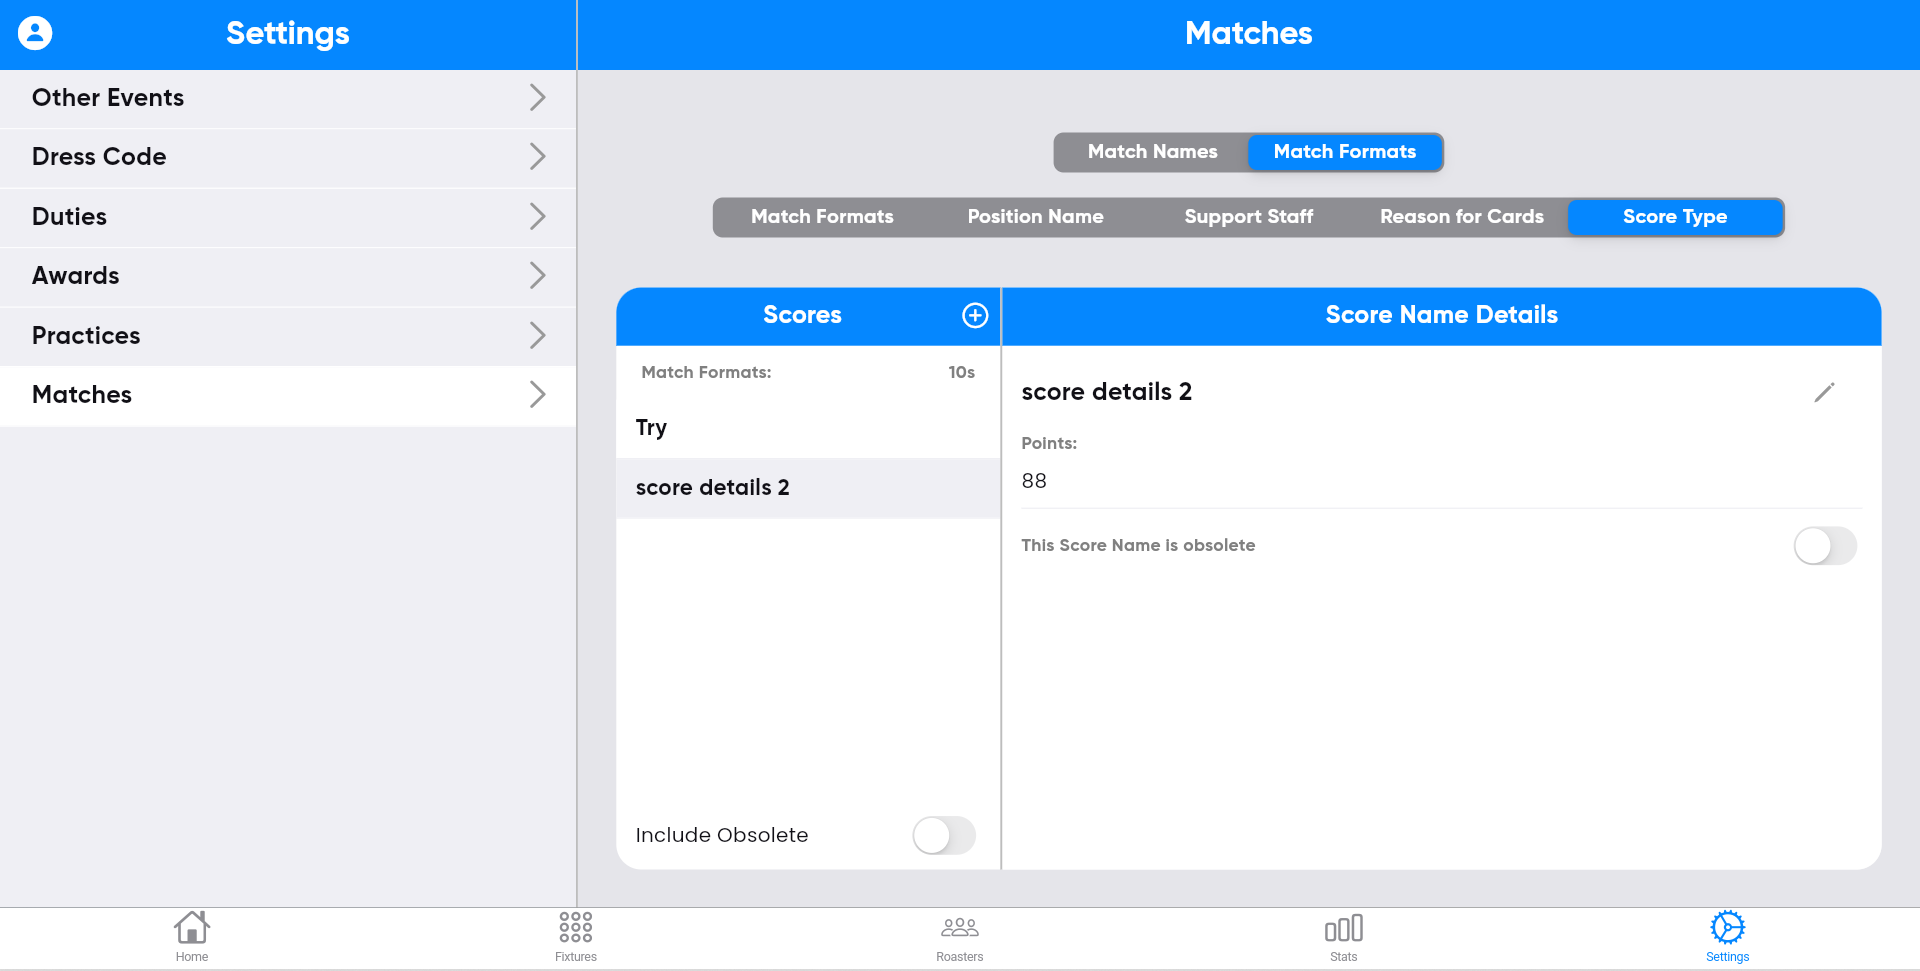
Step-63:
You can edit Score types by clicking the edit
symbol on the right side of the screen.

Updating the information, and then clicking save.

The updated information will be displayed on the screen.
Conclusion
This comprehensive Crusaders Sports club management app covers the entire match lifecycle, from pre-match preparations to post-match analysis. With features for pre-match details, real-time during-match updates, post-match reporting, referee management, and customizable settings, it offers a complete solution for Crusaders Sports clubs. By centralizing these crucial aspects, the app streamlines operations, enhances communication, and improves overall efficiency. It empowers club administrators, coaches, referees, and players with the tools they need for seamless match management and club operations.